Listings
Overview
Listings are essentially auctions, encompassing both reverse auctions and standard bid auctions. Each listing is associated with a specific category. They are created in the same way as Joomla articles, although they are not defined as Joomla articles.
Creating A New Auction
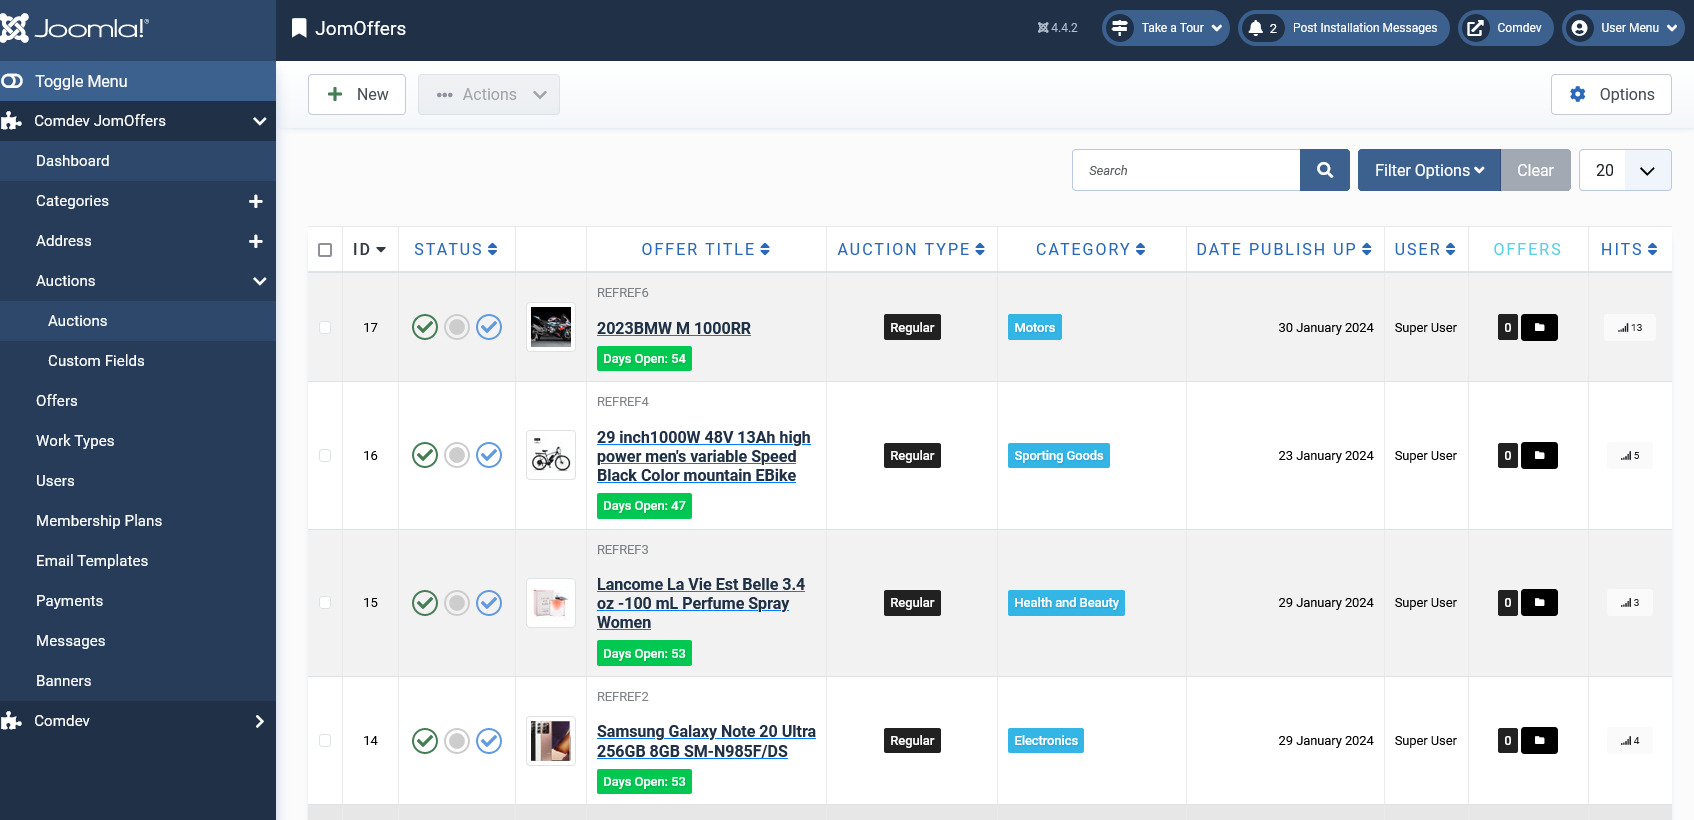
Screen 1: Listing screen
The following table explains the different options seen on the screen.
|
New |
Creates a new Address entry. You must create separate entries for each level of depth that you need. |
|
Edit |
Provides the edit mode to make changes to the existing level or titles created. |
|
Publish |
Publishes the created address entry. |
|
Unpublish |
Removes the entry from the list of published address entries |
|
Archive |
Archives address entries that are not used anymore. |
|
Trash |
Deletes the address entry that is not required anymore. |
| Options | Displays the configuration screen for the JomOffers extension. |
Edit Auction
If you want to edit existing entries, you can either click the entry from the Listings screen or select the checkbox next to the entry, and then click Edit.
Edit Auction tab
This tab provides options to add title, description, select category, and other options for the Listing as seen in the following image:
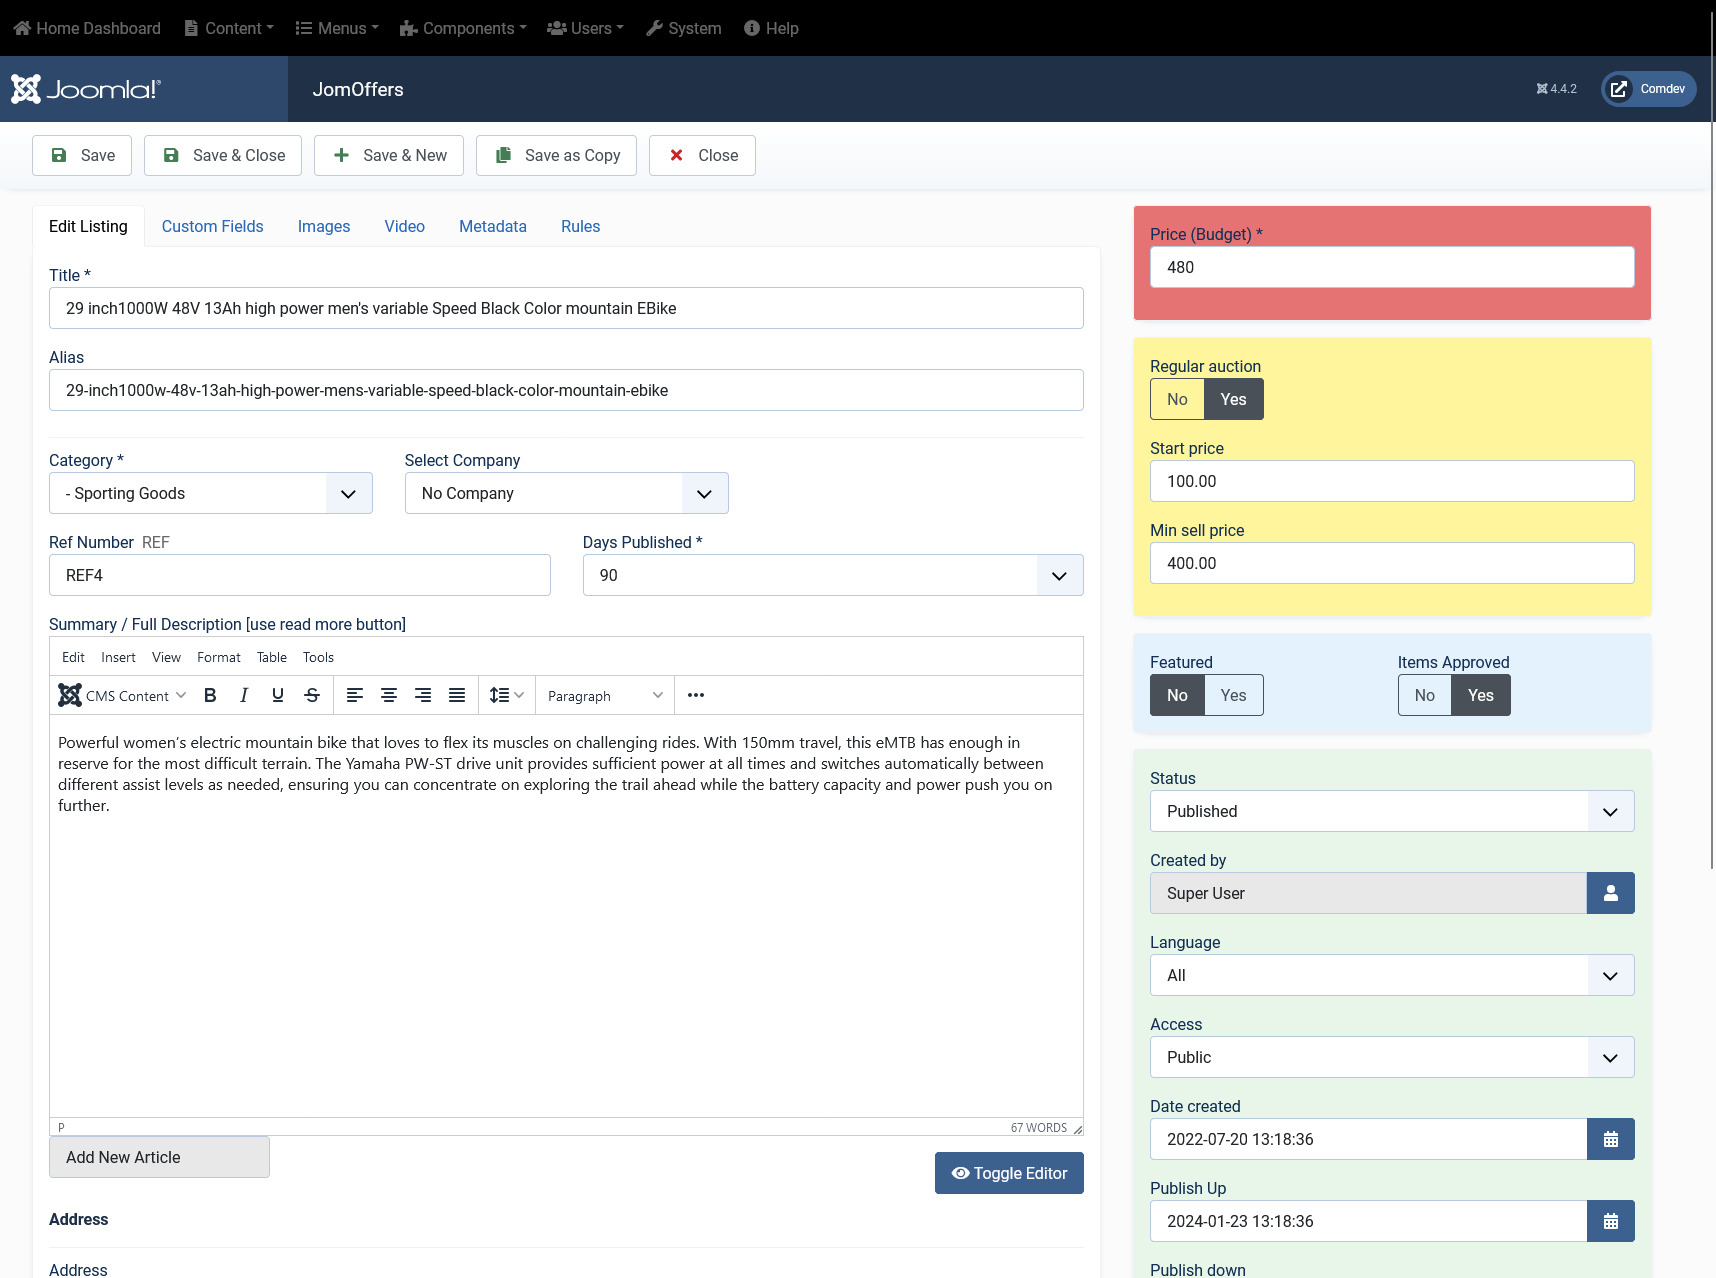
Screen 2: Edit Listing screen
The following table shows the options available:
Edit Listing area |
Title |
Title for the Listing. |
|
Alias |
URL alias for “SEF/SEO” URL. |
|
|
Category |
Category where the listing will be published. |
|
| Work Type | Work location where the listing needs services for. | |
| Regular Auction | If set to Yes than Bids auction type is created otherwise Reverse Auction | |
| Price/Budget | Budget for the services required or Bid product price |
|
| Select Company | Select the company that you need specific offers from. | |
| Ref Number - REF | Reference number for a specific listing. | |
| Days Published | Number of days for which the listing remains active. | |
|
Text Area |
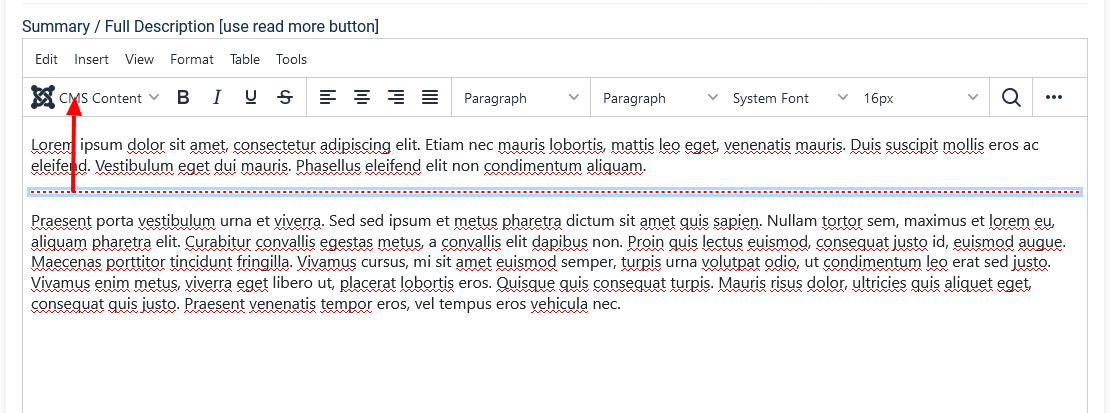
Provide a description for the listing. You can create a short description as well a long description.

In the above image, the highlighted tag appears when you click Read More. Any content above the tag is the short description, while the entire content is the long description. Also, note that if there is no content after the Read More tag, the event description will be blank when users view the listing. Ensure that you have content after the Read More tag.
|
|
|
Article Button |
Click to select a relevant article. If an article is provided, it can be seen under the Details tab in the listing. |
|
|
Page Break Button |
Insert a page break in the displayed text. |
|
Address area |
Address |
Address of the listing |
|
Street, House No. |
Street and house number of the listing - If both Address and Full Address specified, map location will position automatically. |
|
Location area |
Maps latitude |
It utilizes the GEO-location based on Google Maps. Provide the latitude information for the location mapping. |
|
Maps longitude |
The information provided in this field is used to map the exact location. It utilizes the GEO-location based on Google Maps. Provide the longitude information for the location mapping. |
|
|
Maps Search |
Search for a specific location. Type in the location and press Enter to go to the exact location. |
|
Sidebar |
Featured |
Enable to make the listing appear as featured listing. |
|
Approved |
Enable to approve the listing. Listing will not be published. |
|
|
Language |
Select the language for which the listing needs to appear for. For multiple languages, you must create separate entries for each language. |
|
|
Status |
Select the required status.
|
|
|
Created by |
Select the user who created the listing. |
|
|
Access |
Provide the access level for the listing.
|
|
|
Date created |
Select the date when the listing was created. You can select a future date for publishing the listing as well. |
|
|
Publish Up |
Select a date when you want to publish the listing. Here too, you can schedule to post the listing at a future date. |
|
|
Publish down |
Select a date when the listing should stop being published. |
|
|
Modified Date |
Select a date when the listing was modified. |
|
|
Tags |
Provide the tags for the listing. Tags are integrated and maintained with Joomla Tags Component. |
|
|
ID |
This is an auto-generated field. |
Understanding the Location area in Edit listing tab
Let us understand how to provide the address and Street/House No for providing the exact locations on the map. When you provide the address, street and House No. in the backend when creating listings, the location position automatically. If the House No. is not provided, additional location fields needs to be used.
Mapping using longitudes and latitudes
If you provide the latitudes and longitudes, and the Maps Search setting is left blank, the location mapping is done based on these parameters as shown in the following image.
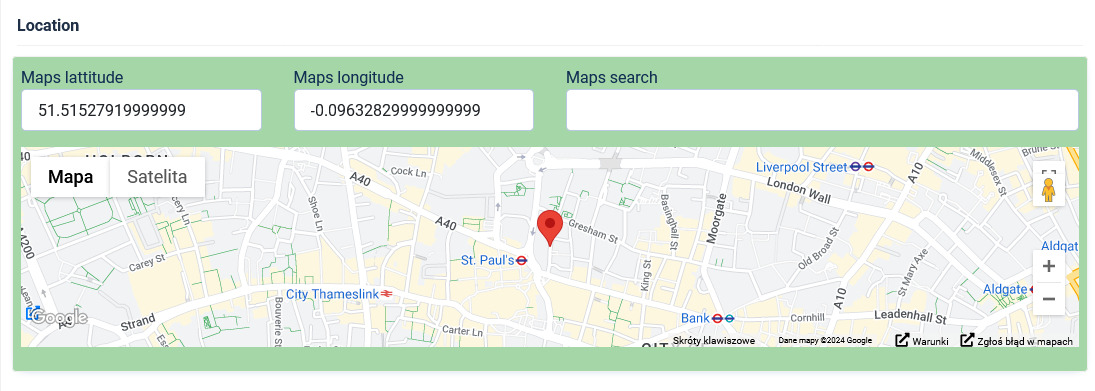

Screen 3: Map using longitudes and latitudes values
Mapping with Map Search values
If the Map Search field has a value provided to it, it takes precedence as shown in the following image. If the Map Search field value is given as “London”, the location will map to this location.
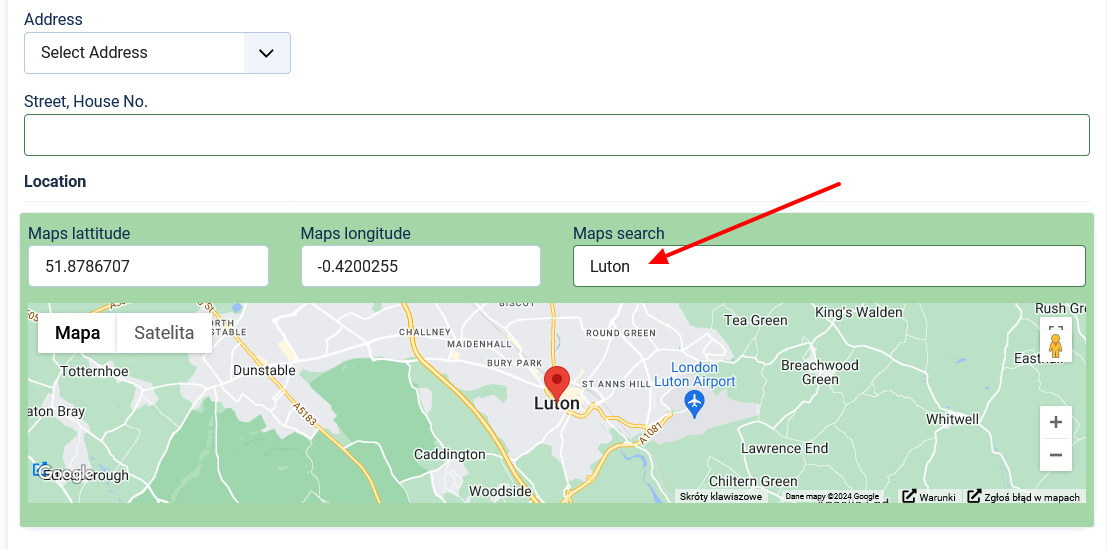

Screen 4: Map using Map Search Field values
Custom Fields tab
This tab includes all the custom fields created for a particular category. If the custom field is not applied to a specific category, it can be seen for all categories when creating a listing. The following image shows the Custom Fields tab screen.
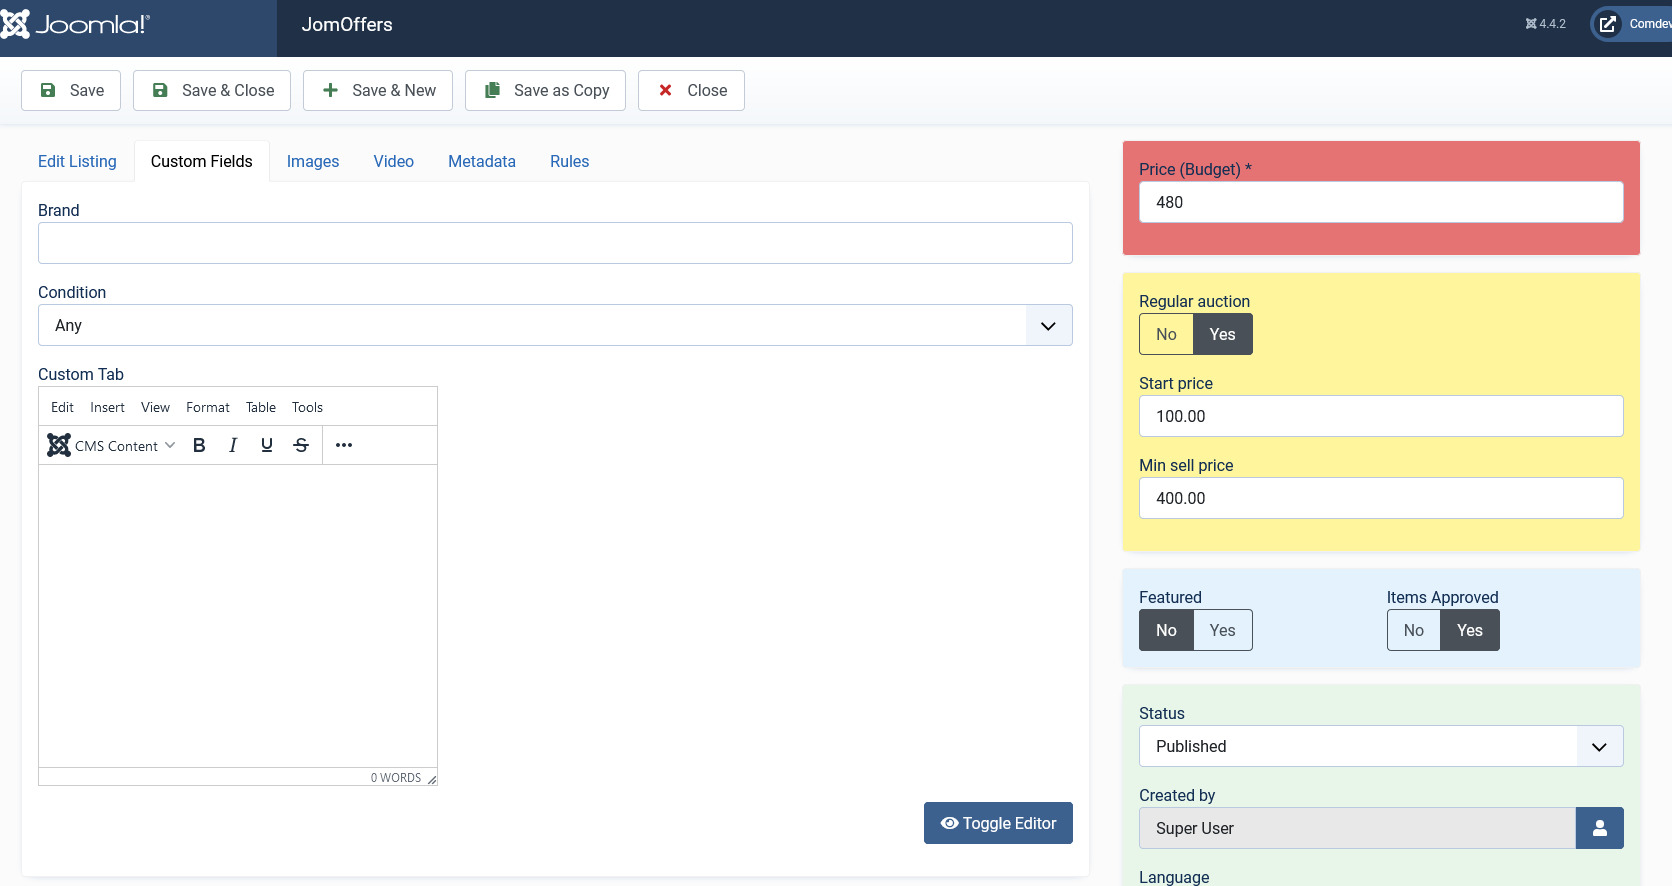
Screen 5: Custom Fields tab
For more information about creating custom fields, see Custom Fields.
Images tab
This tab includes information about images and videos attached to the listing. Before you can add images to the listing, you must save your listing at least once. This ensure that all the other data you have filled for the listing does not disappear after the images are added.
The Images tab can be seen as shown in the following image:

Screen 6: Images tab
Provide the options as shown in the following table.
Images |
Add file area |
Add Files |
Click to select the image that needs to be uploaded. |
|
Drag & Drop Files Here |
Drag a bunch of images to this area to upload multiple images. |
||
|
Upload Into |
Select which category the image falls under:
|
||
|
Add available images & attachments |
Click to add already uploaded images and attachments to this listing. |
||
|
Images area |
Editing an Image |
Click the Click the |
|
|
Attachments area |
Click the Click the Attachments are detected automatically based on file extension that’s are allowed in Configuration . |
||
Video |
YouTube Video |
Provide the YouTube video URL in this field as shown in the following image.
|


Cron job for BIDS - Regular auctions
For regular auctions a cron job needs to be added to clear auctions which have been finished, interval should be set to 1 or 5 minutes:
curl -s 'http://extdev.comdev.eu/index.php?option=com_jomoffers&task=auction.check'Instruction how to set cron job for Plesk panel can be found here: