Membership
Overview
Memberships in Extension are required to set user group level based on the monthly/Yearly pay plan the user selects. Using membership plans, you can decide how much to charge a user and how many listings a user can make for a particular membership plan.
Create a new Membership Plan
Click Components > Extension > Membership Plans > New to create a new membership plan as shown in the following image:
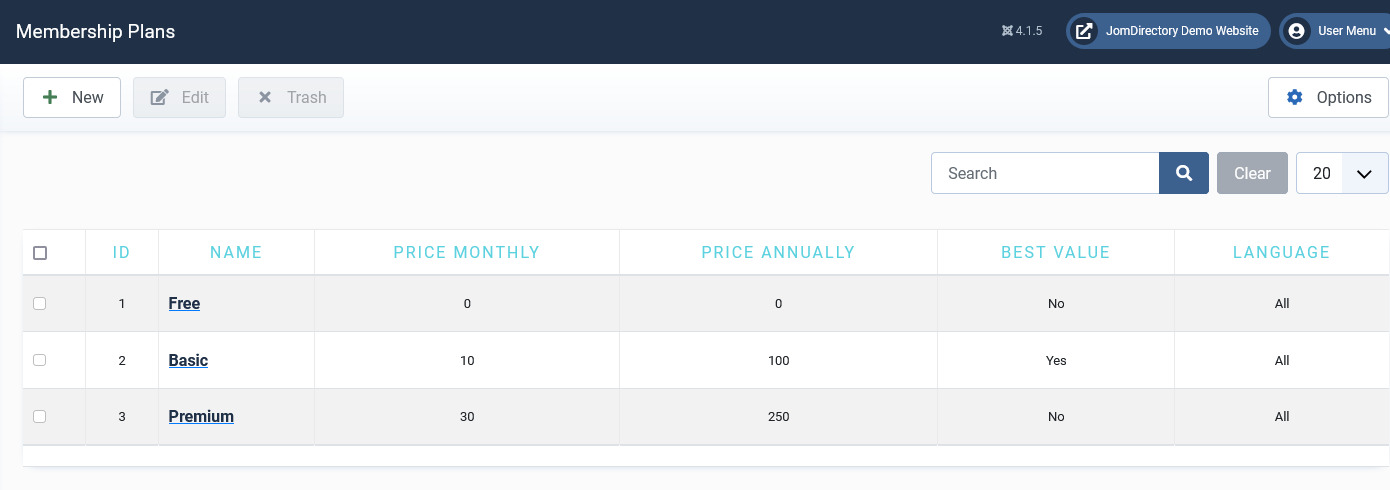
Screen 1: Create new membership plan
Edit Membership Plan
If you want to edit existing entries, you can either click the entry from the Membership screen or select the check box next to the entry, and then click Edit.
The following image shows the Edit Plan screen.
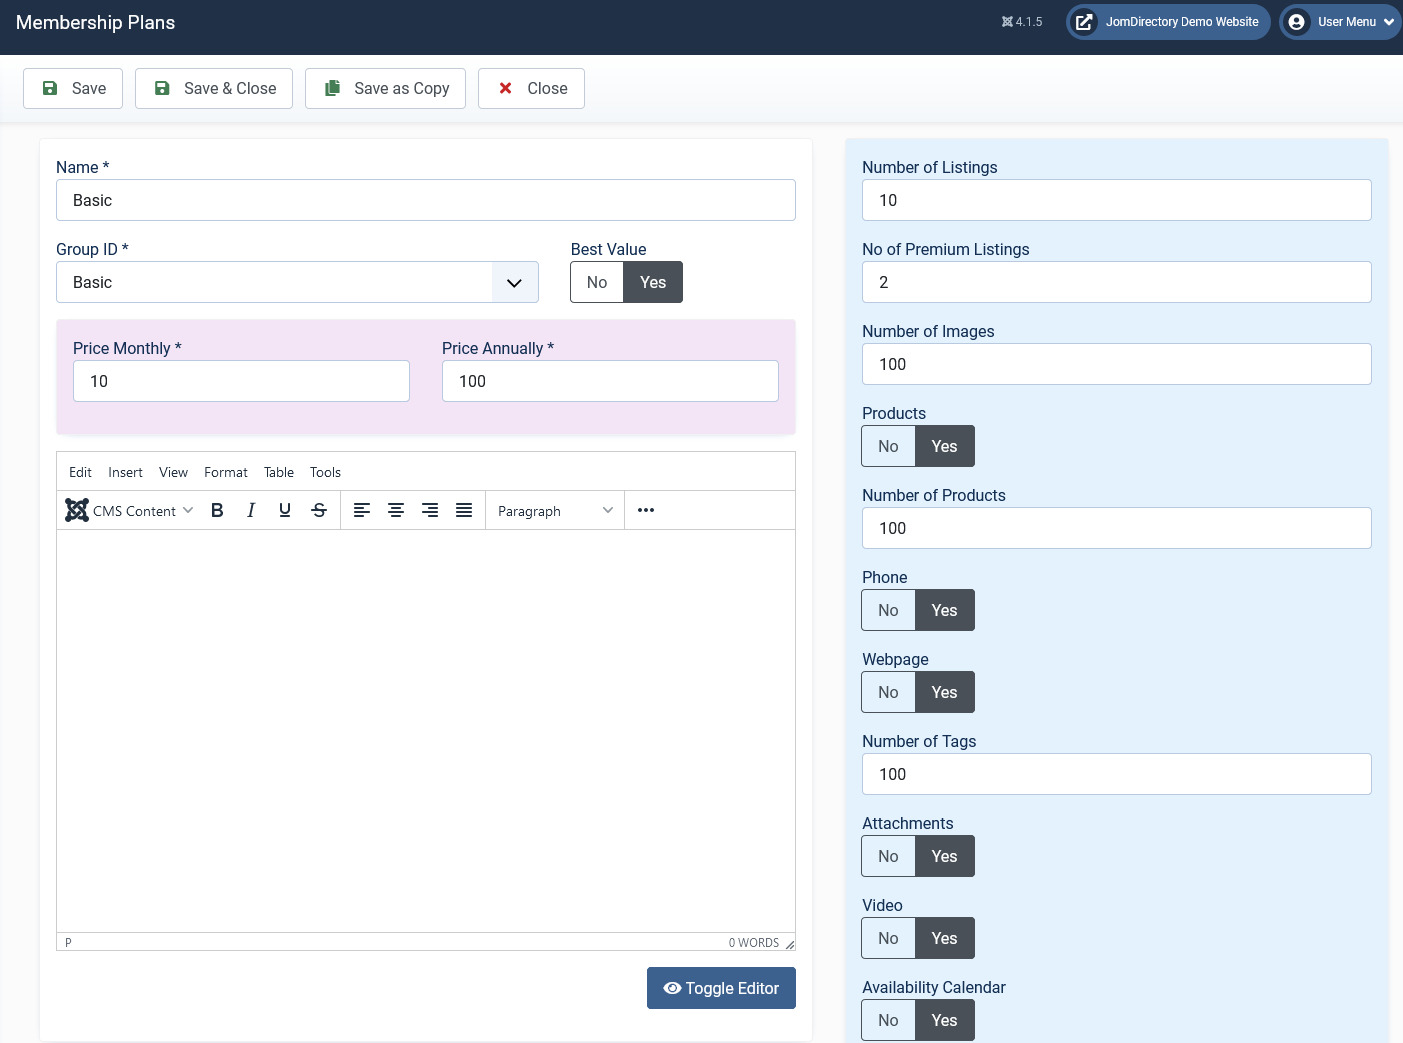
Screen 2: Edit Plan screen
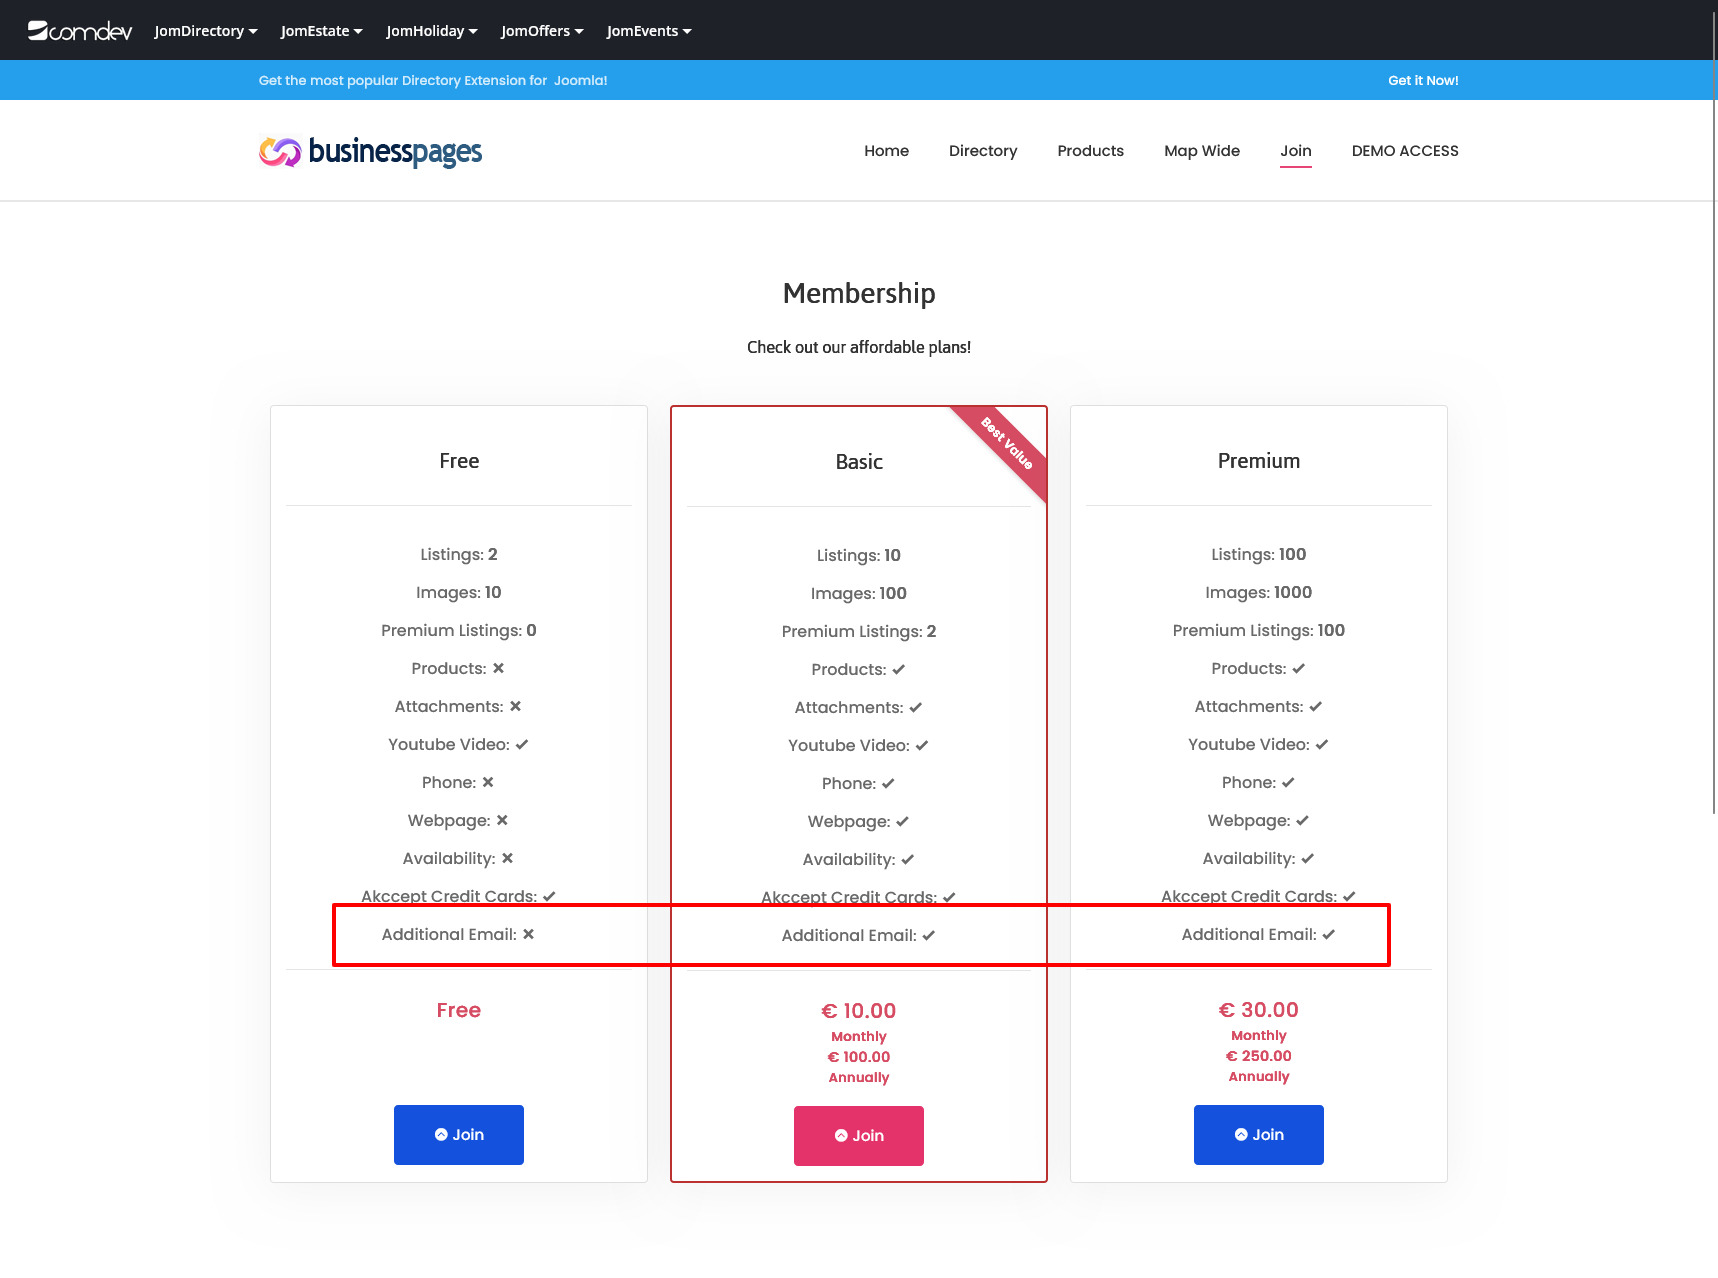
The following table explains the different options seen.
|
Name |
Provide a name for the membership plan. |
|
Number of Listings |
Provide the number of listings the users in the plan can create. |
|
Group ID |
Select the Joomla user group ID for the plan. It is recommended that you create your membership under the Registered group.
|
|
Number of Images |
Provide the number of images the users in the plan can add. |
|
Price Monthly |
Provide the monthly charge for the plan. |
|
Price Annually |
Provide the annual charge for the plan. |
|
Best Value |
Best value badge, that shows in Front Admin (informative) |
|
No of Premium Listings |
Provide the number of premium listings the users in the plan can create. |
|
Attachments |
Enable to allow users to add attachments to listings. |
|
Video |
Enable to allow users to add Video link to the listings. |
| Custom Fields |
Enable custom fields for particular plan. Custom field needs to be assign into Paid Groups to be shown here.
|
|
ID |
This field is auto generated. |
Adding paid custom fields to the Membership plans
For adding a custom field to the membership plan, the field group needs to be set to Paid item. Click Extension > Custom Fields. Click the field you want to add to the membership plan as a paid item. Change the Field Group to Paid item for the Item view and Paid items for the Items view as shown in the following image:
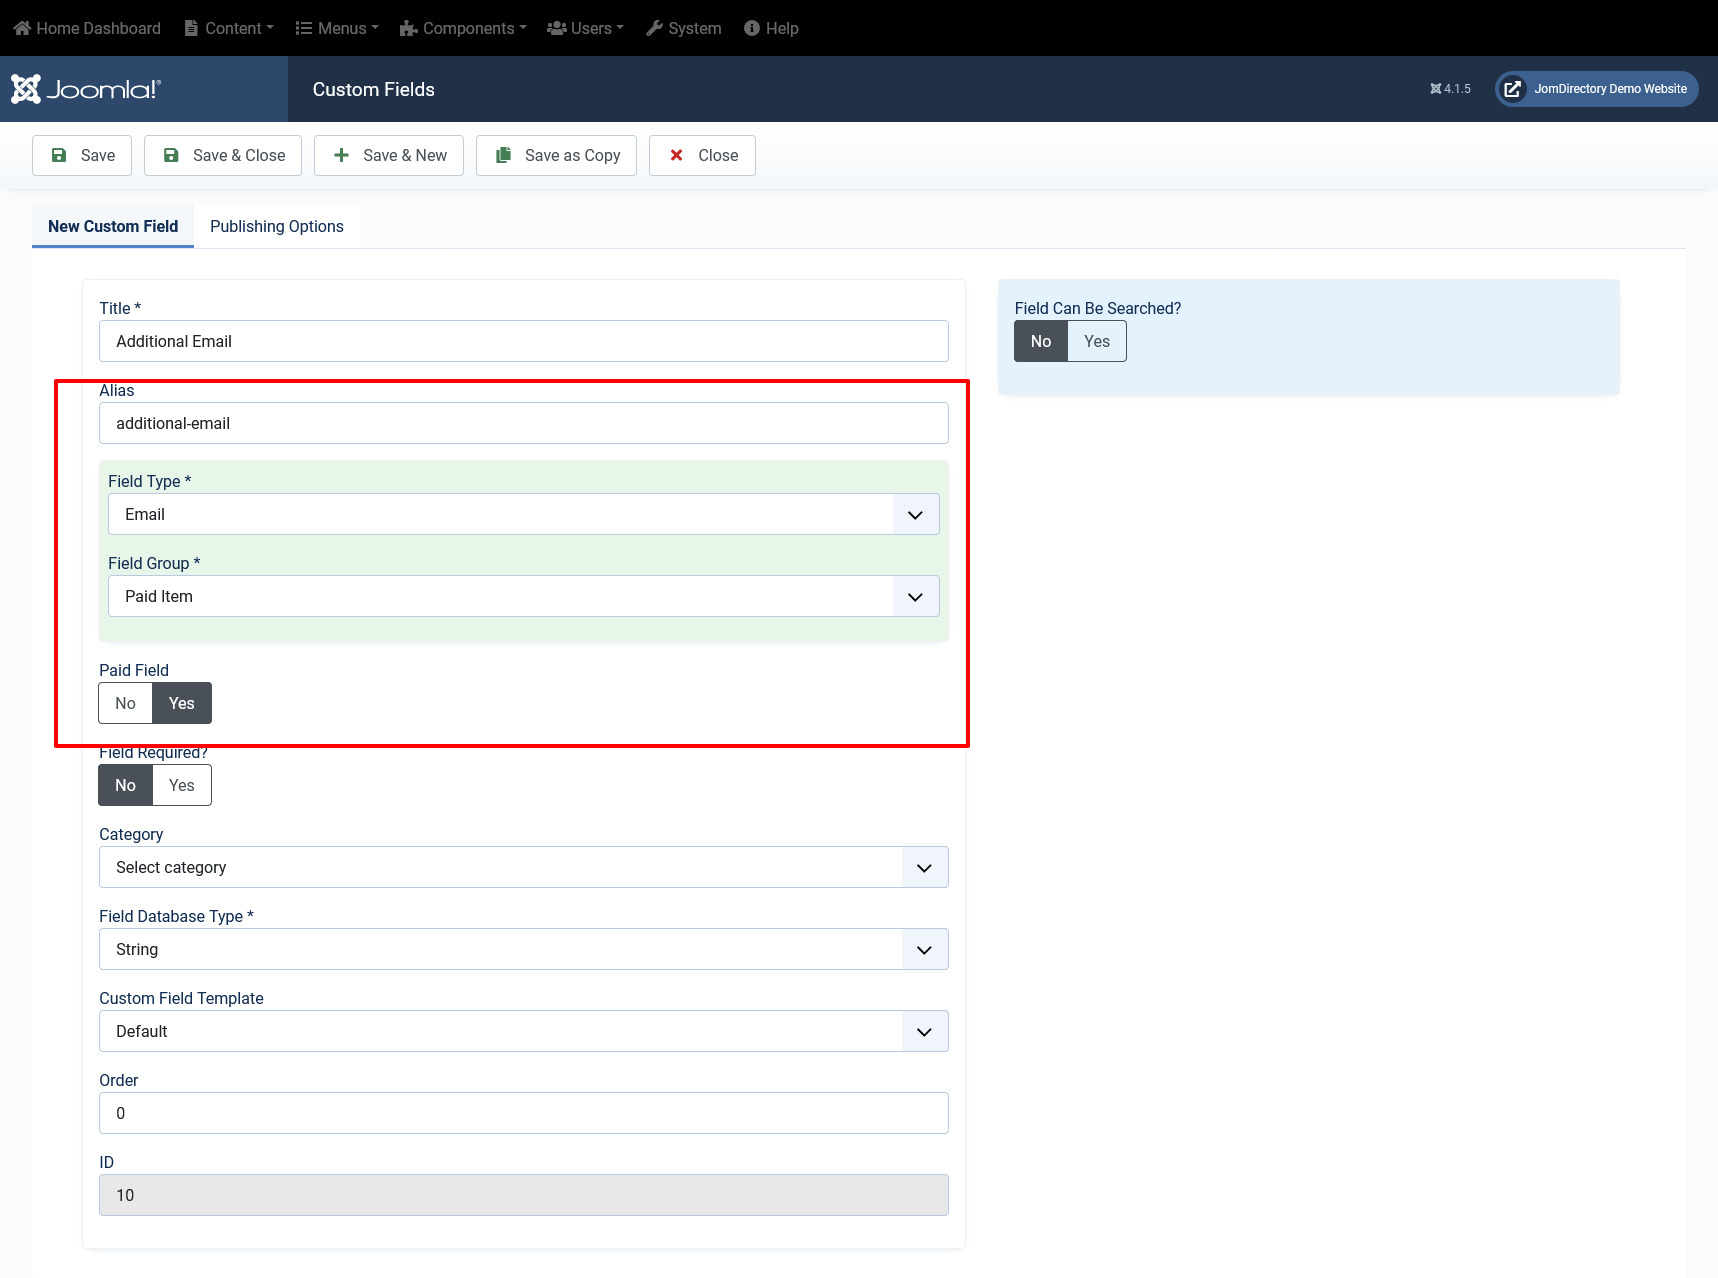
Screen 4: Adding a paid custom field
This field needs to be enabled in the membership plan as shown in the following image.
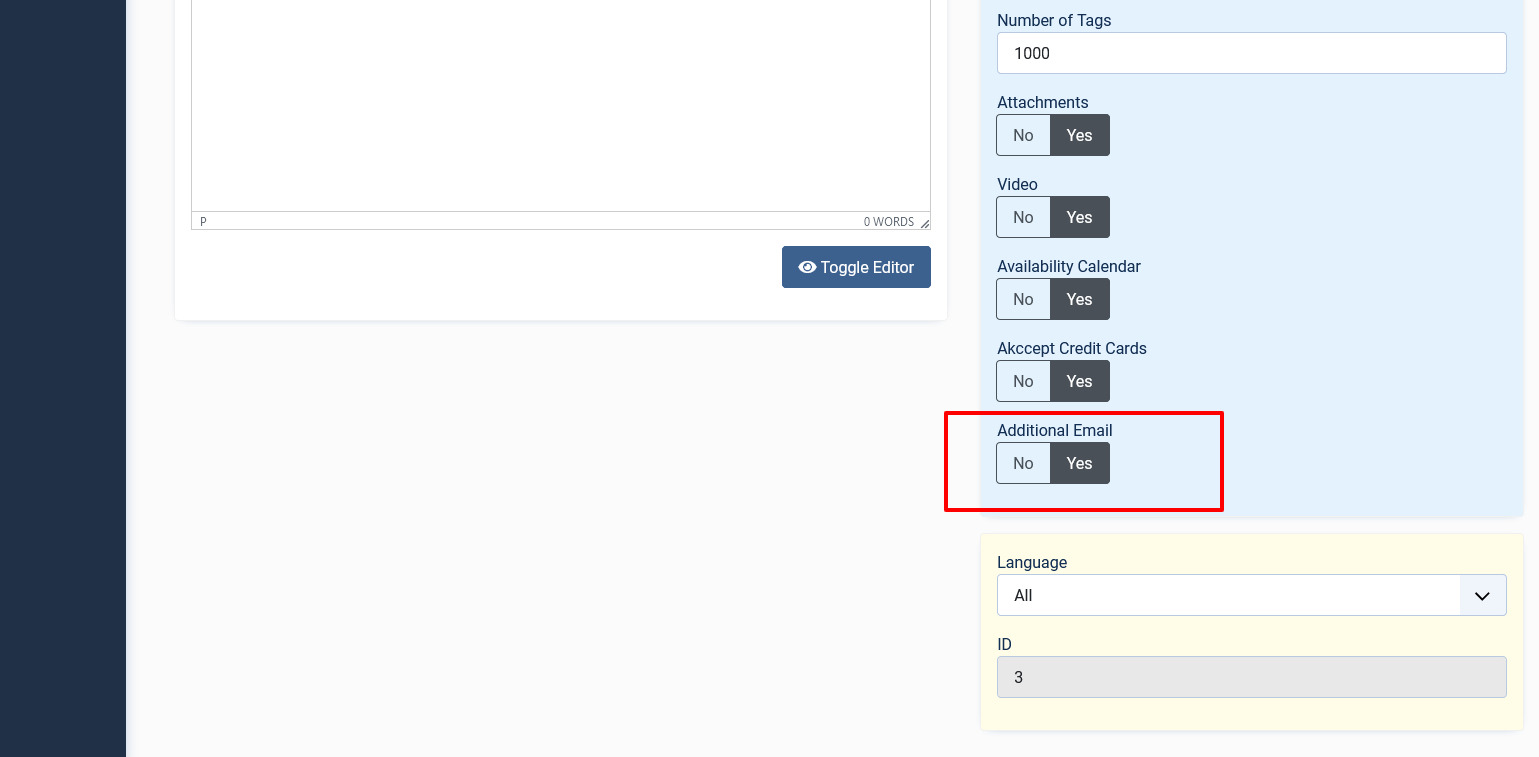
Screen 5: Enabling the paid custom field
This field can be seen in the front admin under the membership plan as follows:
Screen 6: Viewing the paid custom field
Membership expiry email configurations
Before the membership expires, an email can be sent to a user that informs them about his membership nearing expiration. The setting can be seen in the following image:
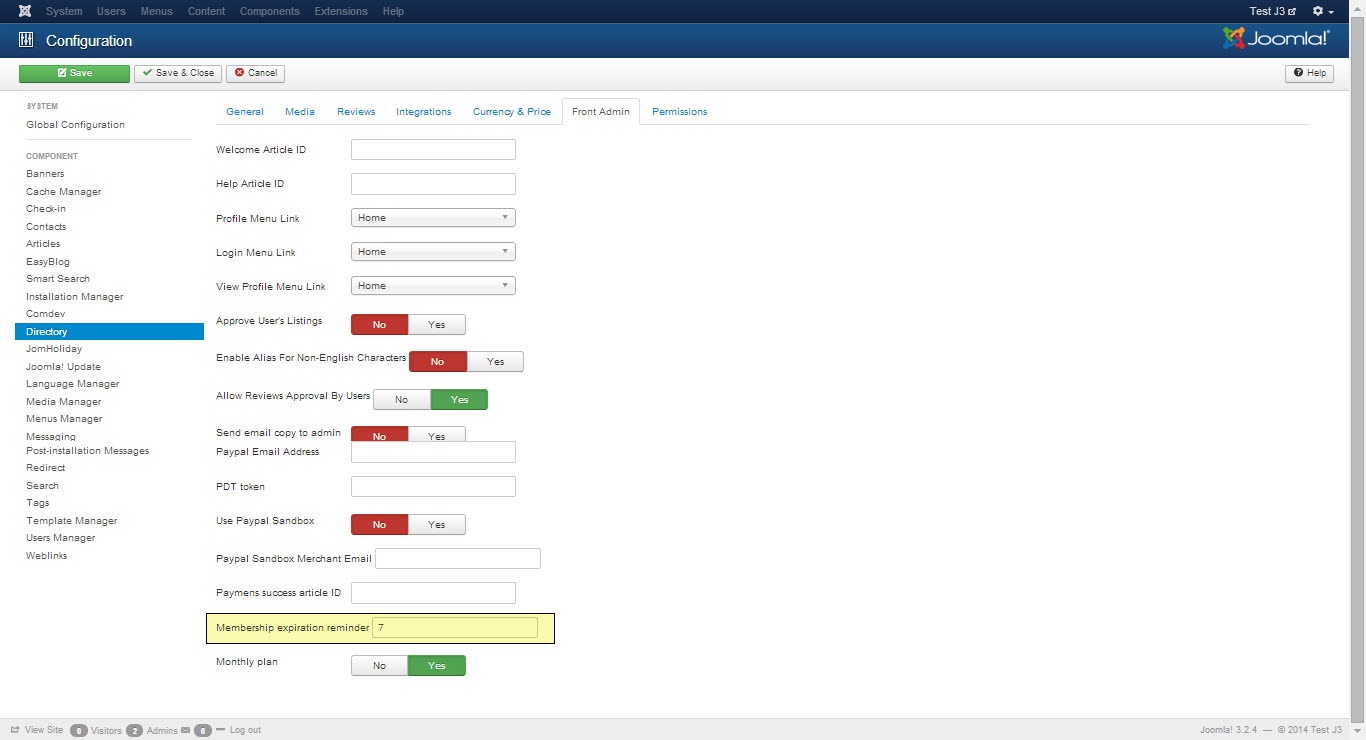
Screen 3: Configure expiry email field
Cron Setting for Membership expiry check
Under your hosting panel a link needs to be added that launches a script. This script checks all users’ membership and sends an email if membership is about to expire:
curl -sS 'http://yourdomain.com?option=com_jomdirectory&task=expiry.send'or
wget -q -O /dev/null 'http://yourdomain.com?option=com_jomdirectory&task=expiry.send'If you are unaware about where the cron setting needs to configured in the hosting panel, contact your hosting support center.
Ensure that the script is launched every day at a particular time consistently.
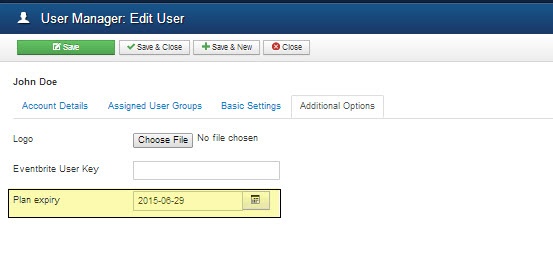
Set Single User expiry date and group
To set plan expiry and attach a group for each user, do the following:
- Click Users > User Manager.
- Click the user for whom you want to set the membership expiry.
- Click the Additional Options tab.
- Provide the expiration date in the Plan expiry field.
- Click the Assigned User Groups tab.
- Select the check box next to the group you want to attach the user to for a particular membership plan as shown in the following image.
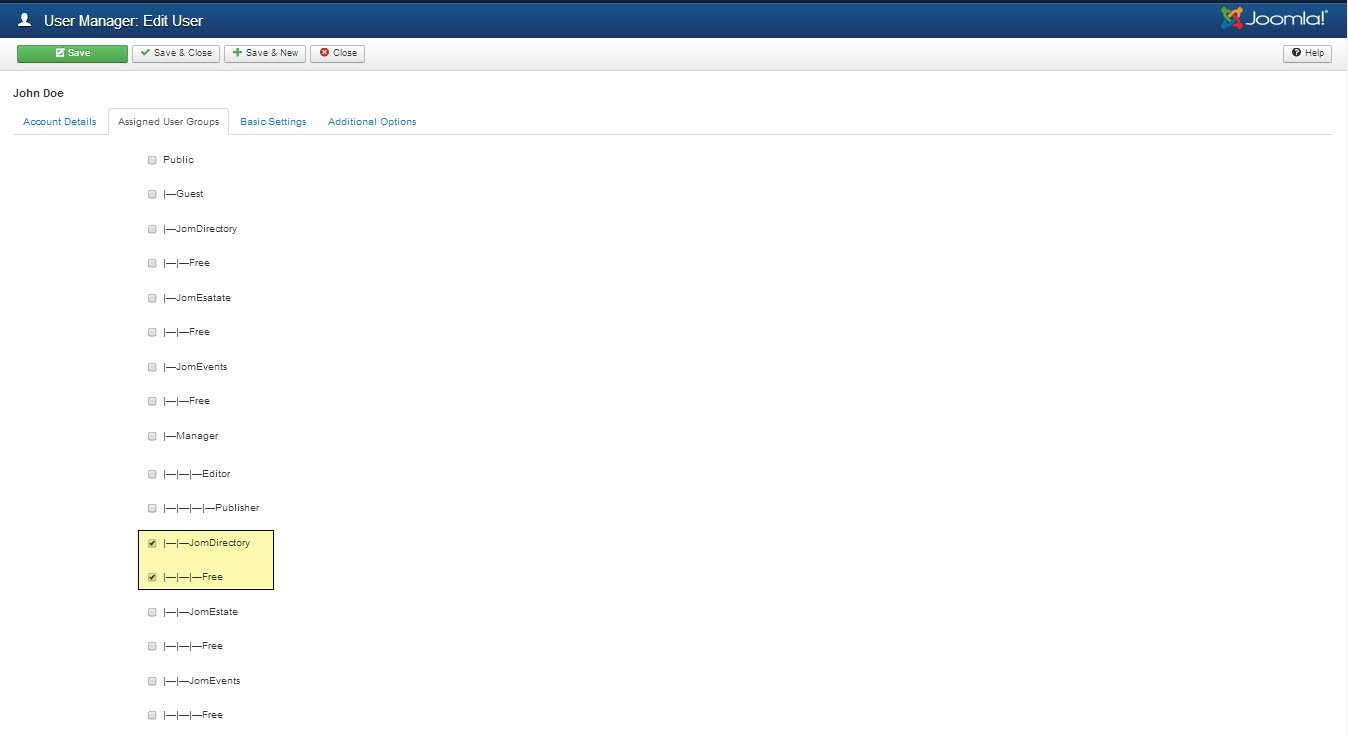
- Click Save.
For more information about membership expiration setting, see Configuration documentation.
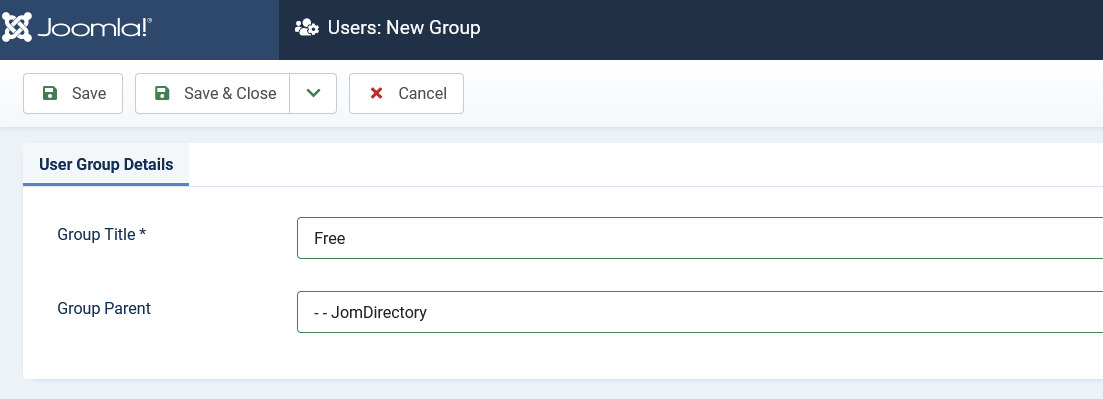
Creating a new Group for Membership Plans
In order to add users to groups for membership plans, you must create a super group named JomDirectory. Then, under it you must create groups for each of your membership plan. These groups are used to provide Group ID when creating a membership plan. Users created using User Manager can be linked to each of these membership plan groups.
To create the JomDirectory group and other groups, do the following:
- Click Users > Groups > Add New Group.
- Provide a name for the group. We need to create JomDirectory group before creating other groups. So, provide the name as JomDirectory.
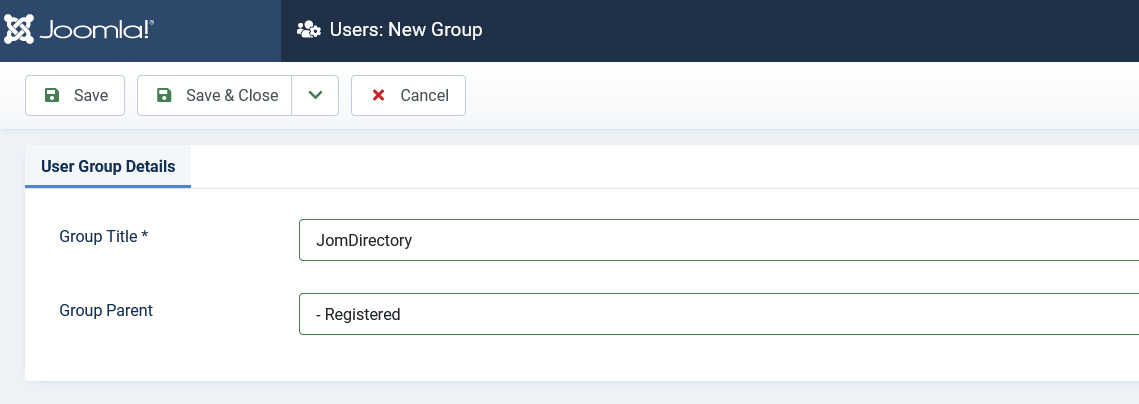
- Repeat steps 1 and 2, but select the parent as JomDirectory.

- Click Save.

User Permissions based on groups
For the users to access Front Admin certain user permissions need to be granted. These settings need to be done in the JomDirectory and Comdev Options.
To provide user permissions for JomDirectory, do the following:
- Click Components > Directory
- Click Options from the right-hand side of the screen.
- Click Permissions.
- Provide the permissions as shown in the following image.

- Click Save.

User permissions also need to be set for Comdev extension as explained here.
- Click Components > Comdev.
- Click Options from the right-hand side of the screen.
- Click Comdev.
- Provide the permissions as shown in the following image.
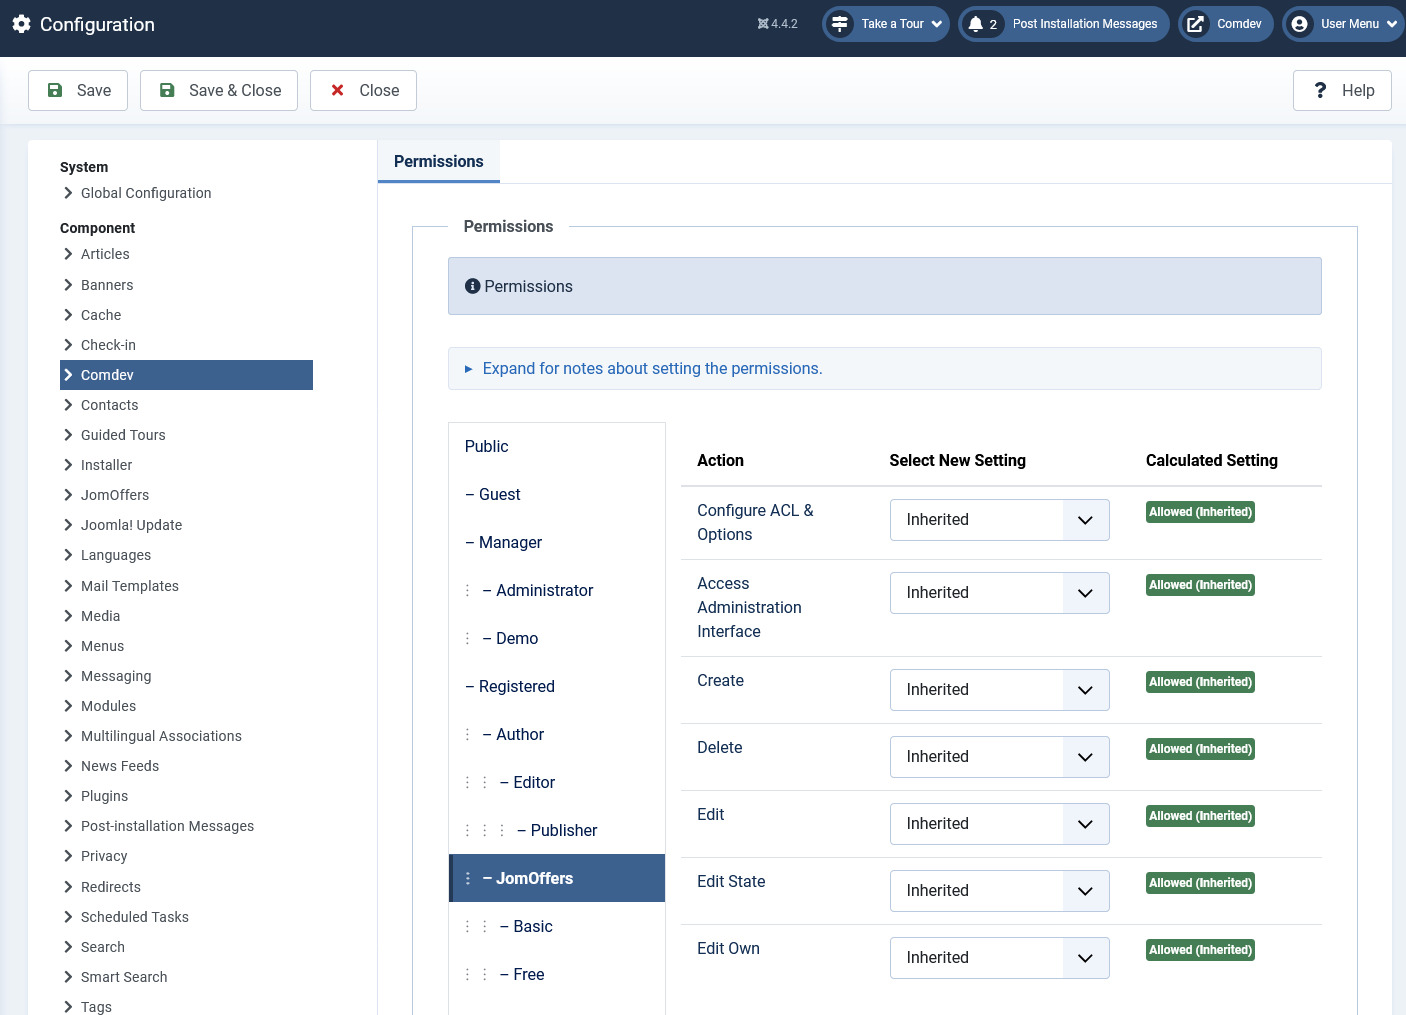
- Click Save.

Users, which belongs to Joomla group JomDirectory, will now have access to Front Admin.
If Permissions for the Comdev component are not set, users would not be able to upload images. A 500 error would show that permissions are denied.