Troubleshooting
Problem when accessing listing details, page refresh but listing details can't be seen
When configuring extensions within Joomla, it is crucial to ensure that your menus display correctly and that other settings, function as intended. A key step in this process involves creating a specific Menu Item link.
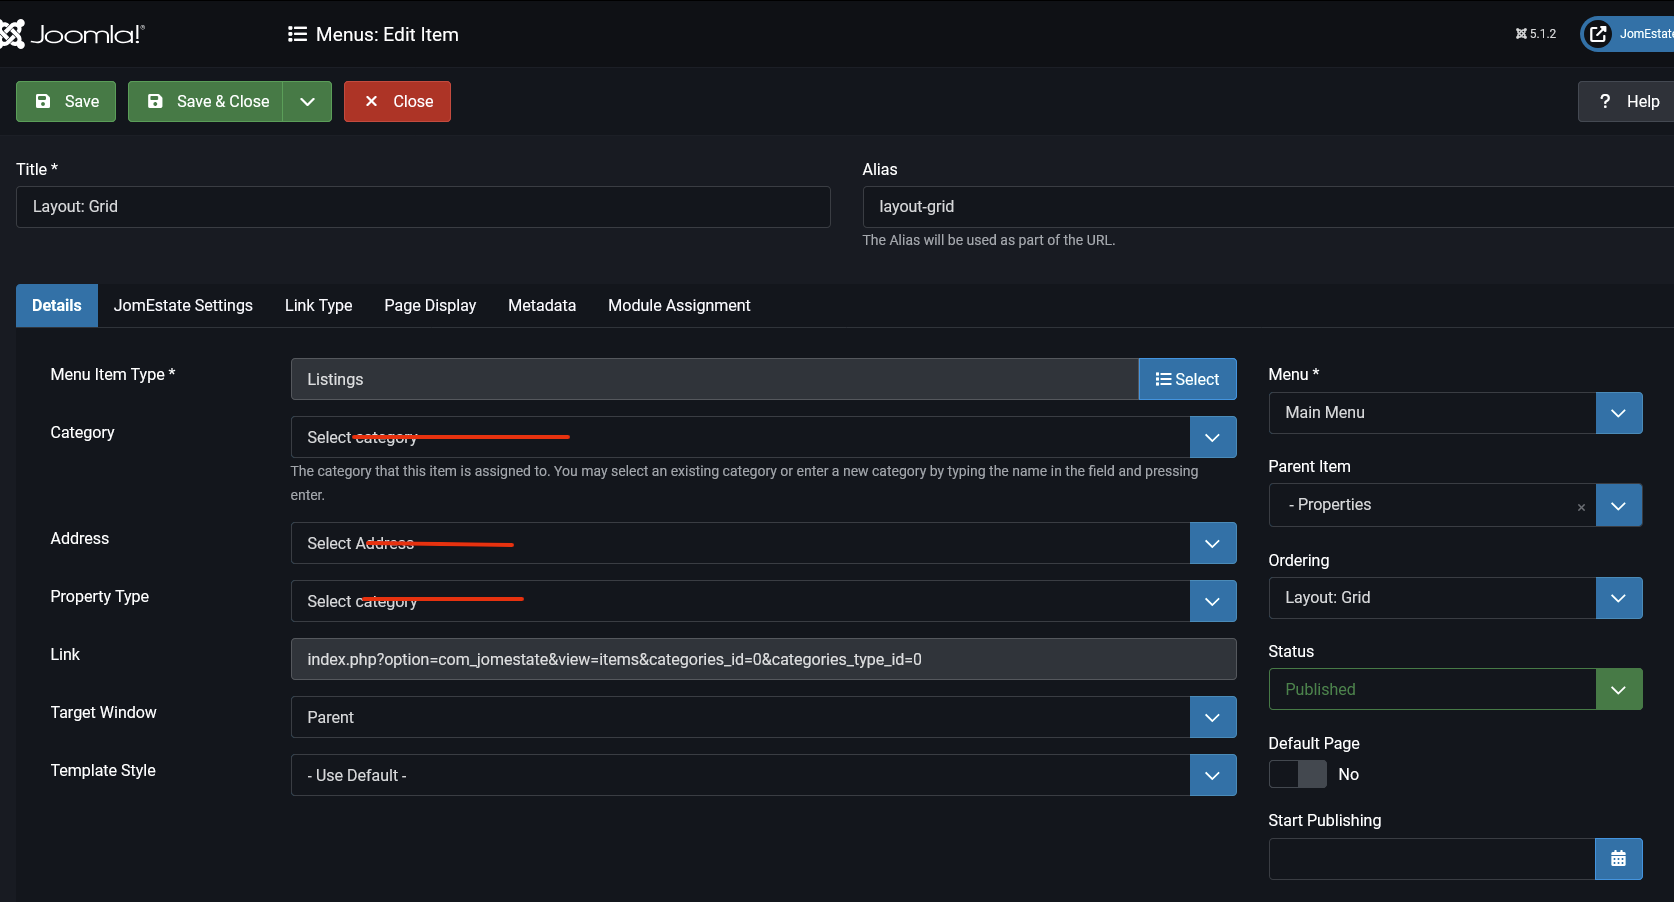
1. Creating a Non-Category/Non-Address Menu Item Link
To achieve proper functionality, you must create a Menu Item link that does not point to any category, specific address, or content directly. This Menu Item acts as a placeholder or root link that helps structure your menus correctly and ensures that the associated settings, like logo placements and layout configurations, are applied consistently across your site.
2. Importance of the Placeholder Menu Item
This placeholder Menu Item is essential because Joomla relies on it to manage the overall structure and behavior of your menu system. Without this link, you may encounter issues where your menus do not display as expected, or where certain settings are not applied correctly. This step lays the foundation for all other Menu Items you might create within the extension.
3. Adding Functional Menu Items
Once you have established this primary Menu Item that does not link to any category or address, you can proceed to create additional Menu Items. These can be of any type, including links that do point to specific categories, addresses, or other content. These functional links will operate as intended and will be properly structured under the main placeholder link you initially created.
4. Further Configuration and Tips
For a more in-depth guide on how to create and configure these Menu Items, you can refer to the "Menu Items" section of this manual. There, you will find detailed instructions on how to link Menu Items to specific content, adjust settings, and ensure that your site’s navigation operates smoothly.
This link is also being used for the search results and filtering along with it's alias.
If you use multilingual site, this link needs to be created for each listing
Some scripts are not loading, calendar is missing, images are not showing
If you experience issues with certain components, such as scripts or images not loading, the most common cause is that the website is placed in a domain directory instead of the root of the domain or subdomain:
❌ Incorrect: www.site.com/mysite
✅ Correct: www.mysite.site.com
Join membership does not work, when clicked on join button nothing happen
Default membership group needs to be set in order for the membership join page work correctly, please check the following:
- Membership groups has been configured correctly.
- Default join group has been set under component Options -> Front Admin tab
Membership group is empty, can't add membership
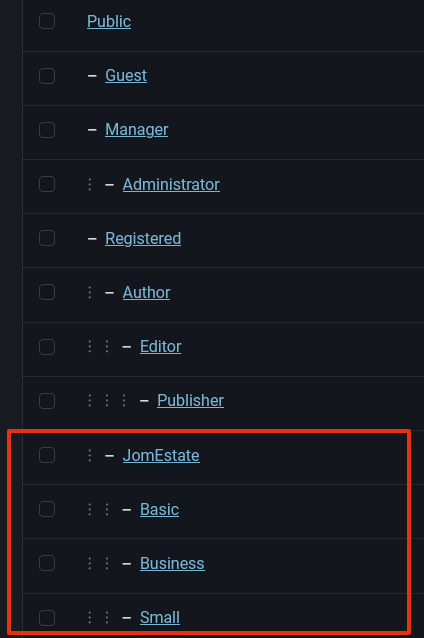
New memberships cannot be added due to the membership group being empty. To resolve this, it is necessary to create a new Joomla group hierarchy.
The process involves setting up a new group structure, with the extension name as the top level of the hierarchy (or subtree). This setup will ensure that memberships are properly assigned and managed under the correct group e.g. for JomEstate proper tree would be:
Date format change
Joomla comes with a standard format for showing dates.
However, there may be a site you have created that will need to use a custom date format.
In this tutorial, I will show you a step by step method on changing your date format for articles.
This method will use no coding and will also introduce you to the Language Manager, one of Joomla's best and most underappreciated features.
Step #1. Create Language Override
- Go to Extensions -> Language Manager.
- Click on Overrides tab.
- Click on New.
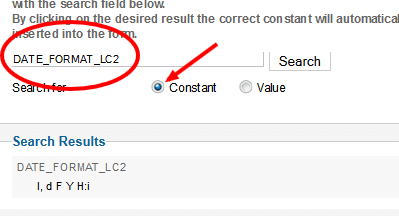
- Check the "Constant" value.
- Search for "DATE_FORMAT_LC2".
- Click on the Constant located under the Search Results.
Step #2. Change Date Format
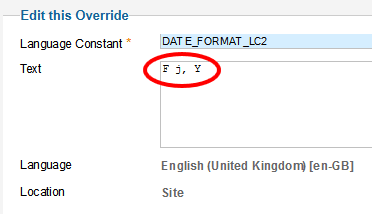
Change the text for your date format to what you'd like.
Just remove the text and type in the format you'd like.
For example, if you want the date to display January 01, 2013, you would use : F j, Y
Can't post reviews, Ra-captcha problem
For Joomla 5 and Re-captcha, please visit Joomla 5 Re-captcha
To complete this guide, you will need to go to the following Google URL to get a reCAPTCHA v2 “Site Key” and “Secret key”: https://www.google.com/recaptcha/ The specific steps will differ based on the Google plan you are subscribed to.
- Login to your Joomla Admin Panel.
- Click the Systems link in the navigation menu.
- Click Plugins under the Manage section.
- Type ‘captcha’ in the search box then click the enter key or click the magnifying glass.
- Next to “CAPTCHA – reCAPTCHA” click the X under Status to enable the extension. You will see an “Extension enabled” message.

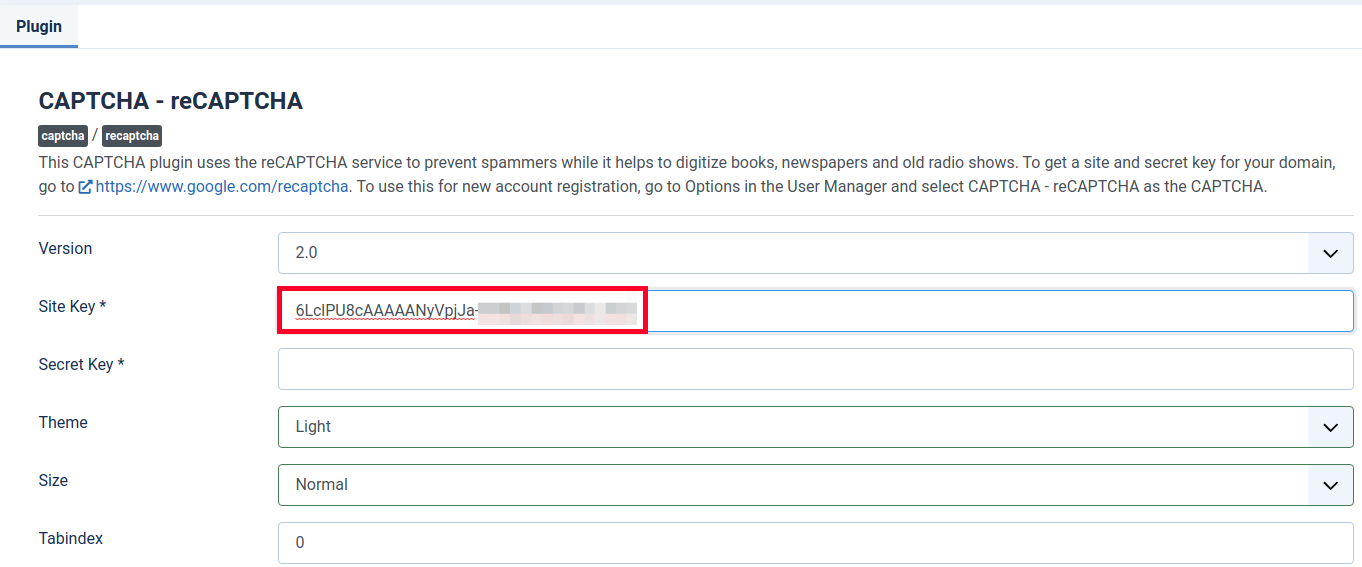
- Click the CAPTCHA – reCAPTCHA plugin link.
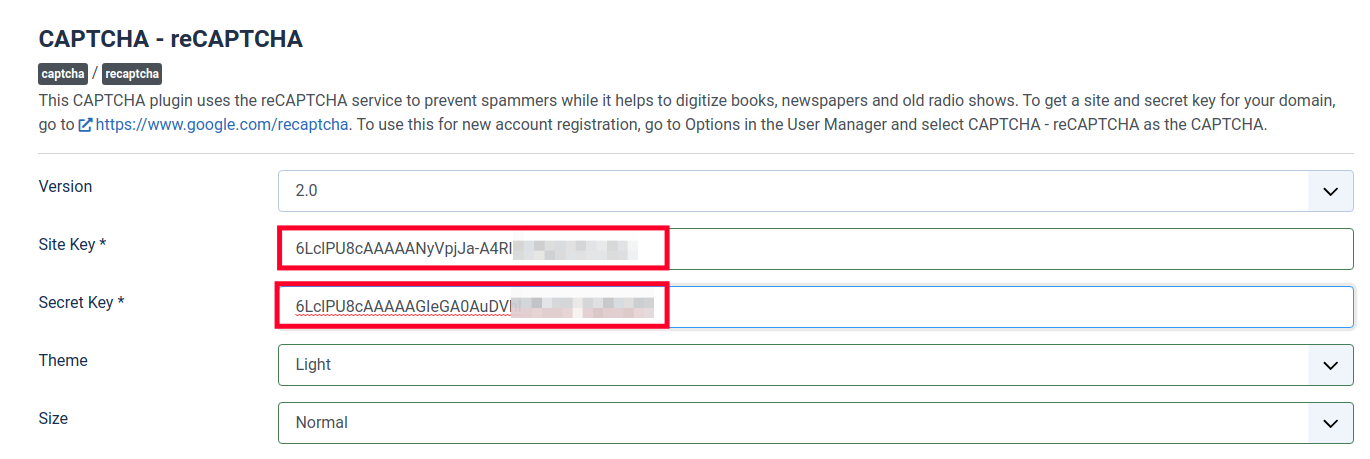
- Enter your Site Key in the available field.
- Enter your Secret Key in the next field.
- Click the Save & Close button. You are finished when you see a “Plugin saved” message.
CAPTCHA is now setup and available to use on your Joomla site. In the next section, we’ll show you how to enable this ability globally
How to Completely Delete a Listing in Joomla
Move the Listing to Trash
- Find the listing you want to delete.
- Select the checkbox next to it.
- Click the Trash button to move it to the trash bin.
Permanently Delete the Listing
To fully remove the listing from your site:
- Go to the Trash section (for Articles: Click "Search Tools" and select "Trashed").
- Select the listing again.
- Click the Empty Trash or Delete Permanently button.
Clear Cache
To ensure the changes reflect properly, clear the cache:
- Go to System > Clear Cache
- Select all and click Delete

