Menu Items

Overview

In this section, we will learn how to create menu items to access JomOffers. 

Menus are used to control website navigation and are a set of menu items. Menu items provide the navigational experience to your users. The menu items in our case must point to the JomOffers. 

Creating Administration Menu Links

This step is not needed if new installation being made.

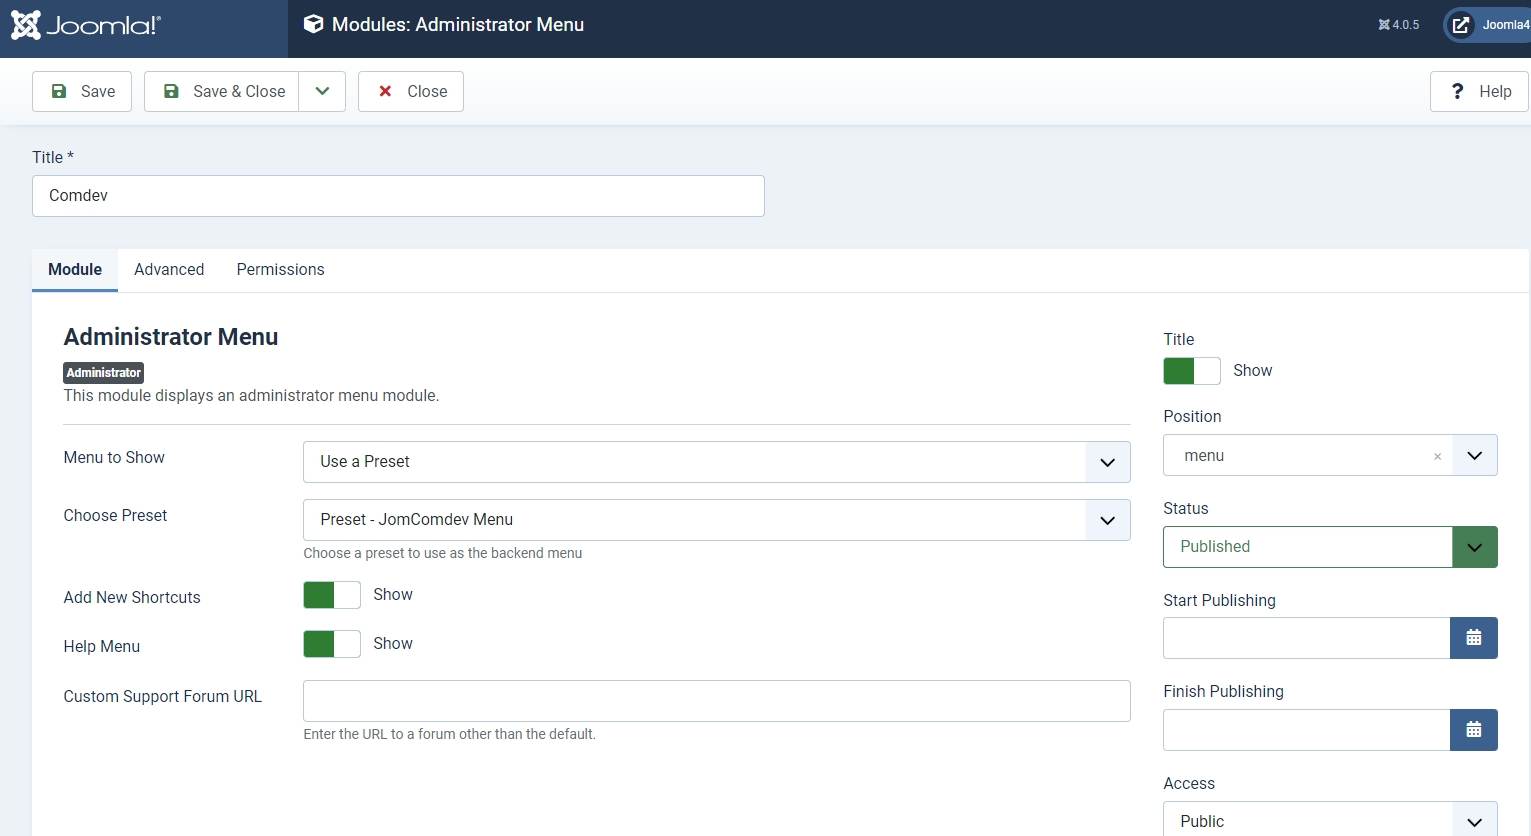
Go to the System -> Administrator modules and insert new. Than choose Administrator Menu. From the presets, select Comdev and place it under menu position. Do the same for the JomOffers:

Creating Menu Items to access JomOffers

Creating an Items menu link is mandatory. If you have a multilingual site, ensure that you create an Items menu link for each language. You can hide this menu link, but it needs to be created nonetheless. Though you are creating an Items link that does not point to any category or address, you can create other links with Items menu type that can point to an address or a category once main Items link has been created.

Reverse Auctions:

To create menu items with Items menu item type, do the following:

  1. Click Menus > <your_menu>(Main Menu) > Add New Menu Items.
  2. Provide a title in our case is Latest Listings in the Menu Title field. Now, since the Latest Listings menu item provides a list of all the latest postings on the site, we have selected the menu type as Items. The Alias field will build URL for the site. When search is done this will be the landing page for the search results as well. 

  3. Provide the options as seen in the following image:

    obraz.png


    Screen 1: Items menu item screen


    Provide the values based on the following table.

  4. Menu Item Type

    Click Select. A pop up is displayed. In this case, since we are creating the Items menu item, click JomOffers> Items from the list.

    Category

    Select the appropriate category, if creating direct category link.

    Address

    Select the appropriate address if, creating direct address link.

    Auction type

    Set an Auction type: Reverse or Regular (BIDS)

    Link

    This field is auto populated based on the menu item type selected.

    Target Window

    Select the parent for this menu item.

    Template Style

    Select the template style you want for this menu.

    Click Save.

Bids

  1. Click Menus > <your_menu>(Main Menu) > Add New Menu Items.
  2. Provide a title in our case is Latest Listings in the Menu Title field. Now, since the Latest Listings menu item provides a list of all the latest postings on the site, we have selected the menu type as Items. The Alias field will build URL for the site. When search is done this will be the landing page for the search results as well. 

  3. Provide the options as seen in the following image:

obraz.png

Ensure that you see a green tick next to this menu item. The green tick indicates that the item is published. To publish an item, select the check box next to the item and click Publish

To view the created menu item, go the front end of your site. The new menu item is displayed.

Creating Menu to access JomOffers Front Admin

To create menu items with Front Admin menu item type, do the following:

  1. Click Menus > <your_menu>(Main Menu) > Add New Menu Items.
  2. Provide a title as Front Admin and the alias as front-admin in the Menu Title field.
  3. Provide the options as seen in the following image:

    obraz.png


    Screen 2: JomOffers Front Admin menu item screen

  4. Click Save.

Front Admin Options

For the Menu to be able to access the JomOffers Front Admin, certain settings need to be made. The following table shows the three menu links that need to be made and linked with JomOffers Options. You can create these 3 menu items anywhere on the site e.g. link them under User Menu.

Profile Edit Menu Link

This link should point to Edit profile menu item created using Edit User Profile menu item type.

  1. Click Menu > <your_menu>(Main Menu)>Add New Menu Item.
  2. Provide the Title as Edit Profile and the menu item type as Edit User Profile, under Users Manager.
  3. Click Save.
 

This link should point to the login form menu item created using Login Form menu item type.

  1. Click Menu > <your_menu>(Main Menu)>Add New Menu Item.
  2. Provide the Title as Login Form and the menu item type as Login Form, under Users Manager.
  3. Click Save.

 The following image shows how the Login Form menu item is used.

When user is not logged into the front page, he will be redirected to the built-in Joomla login form. After successful login, he will be redirected to the JomOffers Front Admin.
The following image shows the redirect URL that needs to be provided. The value you provide in the Login Redirect field depends on the following:

  • http://domain.com/index.php/front-admin - Use if URL rewriting is not applicable.
  • http://domain.com/front-admin - Use if URL rewriting is applicable.

In our example, we are using the http://domain.com/front-admin URL as shown in the following image where front-admin is the alias of the JomOffers Front Admin Menu Link:

Profile View Menu Link

This link should point to the user profile created using User Profile menu item type.

  1. Click Menu > <your_menu>>Add New Menu Item.
  2. Provide the Title as User Profile and the menu item type as User Profile.
  3. Click Save.
 

Make the following settings for the Front Admin are made in the JomOffers options for the user to be redirected correctly to the Front Admin, when he is not logged in.

  1. Click System > Control Panel.
  2. Under Extensions, click JomOffers.
  3. Click Options in the top right-hand corner of the screen.
  4. Click the Front Admin tab. 
  5. Change the Profile Menu Link, Login Menu Link, and View Profile Menu Link field as per the following image.

    Screen 3: JomOffers Front Admin options

  6.  Click Save.

The Front Admin lets users add listings in the front of the site. For more information about how to add listings, see Front Admin. The following image shows the Front Admin.

Screen 4: Front Admin screen