Quick Start
Overview
This guide will help you get started with using the JomEstate extension quickly. It highlights preliminary steps that are a must for JomEstate configurations. After you are done with them, you can go ahead and create the listings on your site.
Creating Administration Menu Links
This step is not needed if new installation being made.
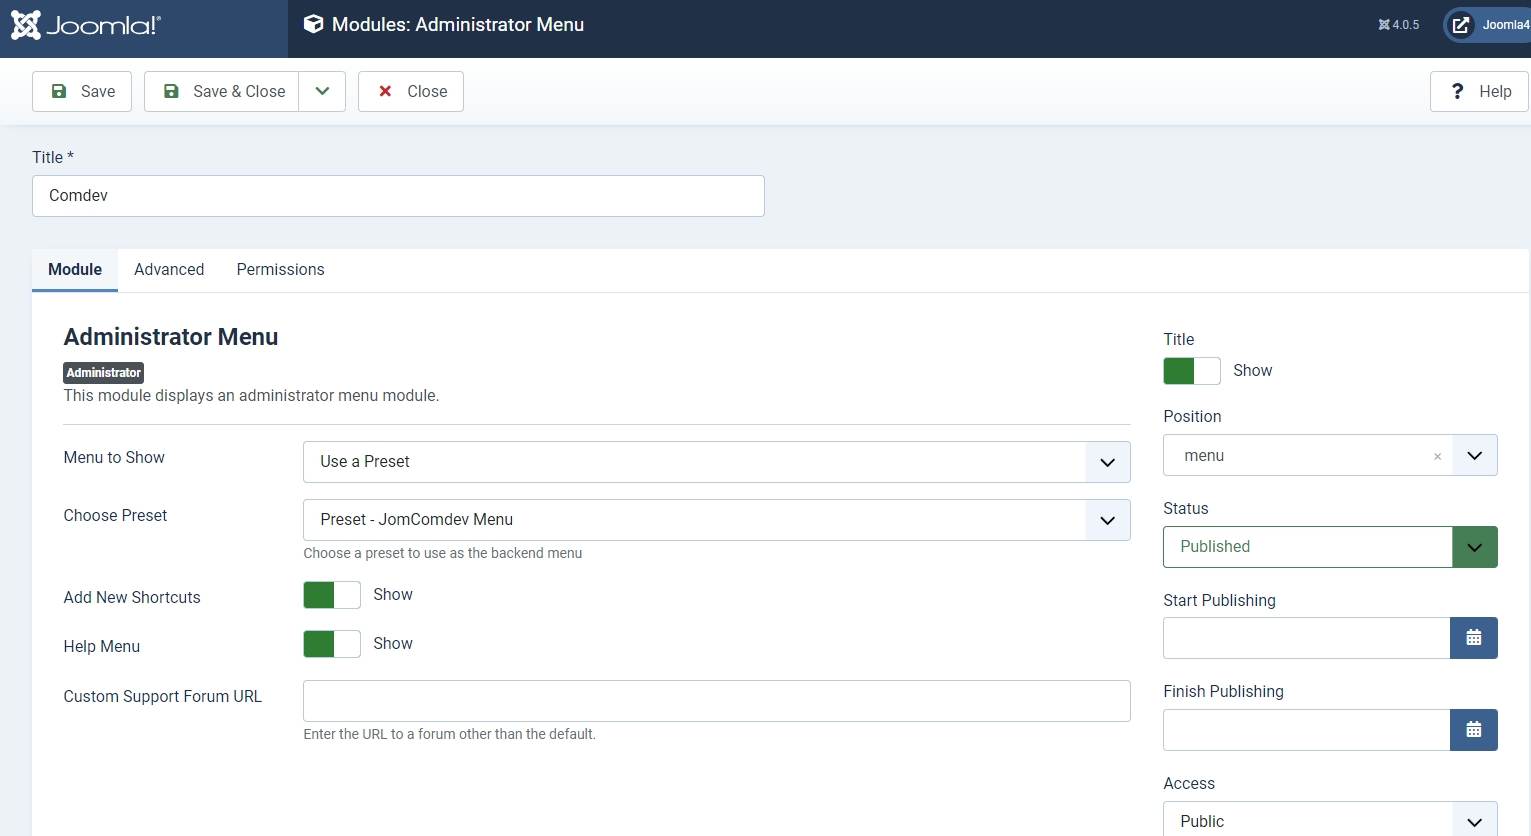
Go to the System -> Administrator modules and insert new. Than choose Administrator Menu. From the presets, select Comdev and place it under menu position. Do the same for the JomEstate:

Creating Menu Links
Get started with creating menu links using the information given in the Menu Items documentation in the Administrative Guide.
Creating Groups
In order to add users to groups for membership plans, you must create a super group named JomEstate, then create groups for each of your membership plans underneath your super group. These groups are used to provide Group ID when creating a membership plan. Users created using User Manager can be linked to each of these membership plan groups.
To begin creating groups for membership plans, follow the Creating a Group documentation in the Administrative Guide.
Creating Membership Plans and Memberships
Memberships in JomEstate are required to set user group level based on the monthly/Yearly pay plan the user selects. Using membership plans, you can decide how much to charge a user and how many listings a user can make a particular membership plan.
Before you can create a membership plan, you must create Joomla groups using the above section information. Read more about creating membership plans for your site using the Memberships section in the Administrative Guide.
Adding a New Address
The Address feature lets you provide the country, region and city for the associated product listing. The advantage with the Address field in JomEstate is that after you configure a particular address, it is shared across various components in the Comdev extension.
Get started with creating addresses that will be used in your listings by referring to the Address documentation in the Administrative Guide.
Adding a New Category
Categories allow the site owner to categorise listings into appropriate sections. JomEstate categories are independent of the Joomla category system. Nested categories (sub-categories) are supported in JomEstate. The component comes with a default category named "UNCATEGORIZED", which holds listing items that are not attached to any category (same function as the default Joomla system).
To start creating categories, follow the Categories documentation in the Administrative Guide.
Adding Custom Fields
Custom fields are a powerful tool to build content. We provide a variety of field types with the ability to outline into groups. Each field can be assigned to a single category or all categories. Custom fields in JomEstate provide multiple options such as dropdowns, text area, radio buttons, and so on. Based on your requirement create a custom field and make it searchable for better user experience.
Read more about how to create custom fields in the Custom Fields section from the Administrative Guide.
Creating a New Listing
Listings are nothing but the product listings that you want to create in the directory. Each listing is attached to a category. They are created in the same manner as Joomla articles but are not related to Joomla articles in the definition.
Get started with creating listings for each category by referring to the Listings section in the Administrative Guide.
