Address
Overview
The Address feature, as the name suggests, lets you provide the country, region and city for the respective product listing. The advantage with the Address field in Extensions is that after you configure a particular address, it is shared across various components in the Comdev extension.
Based on the depth of levels you want, such as the continent as Europe, country as the UK and region as Wales, you can configure the Address tree to have unlimited levels. The Address feature provides multilingual support. This means you can specify different names based on your language preference. For more information, see Languages.
Creating A New Address
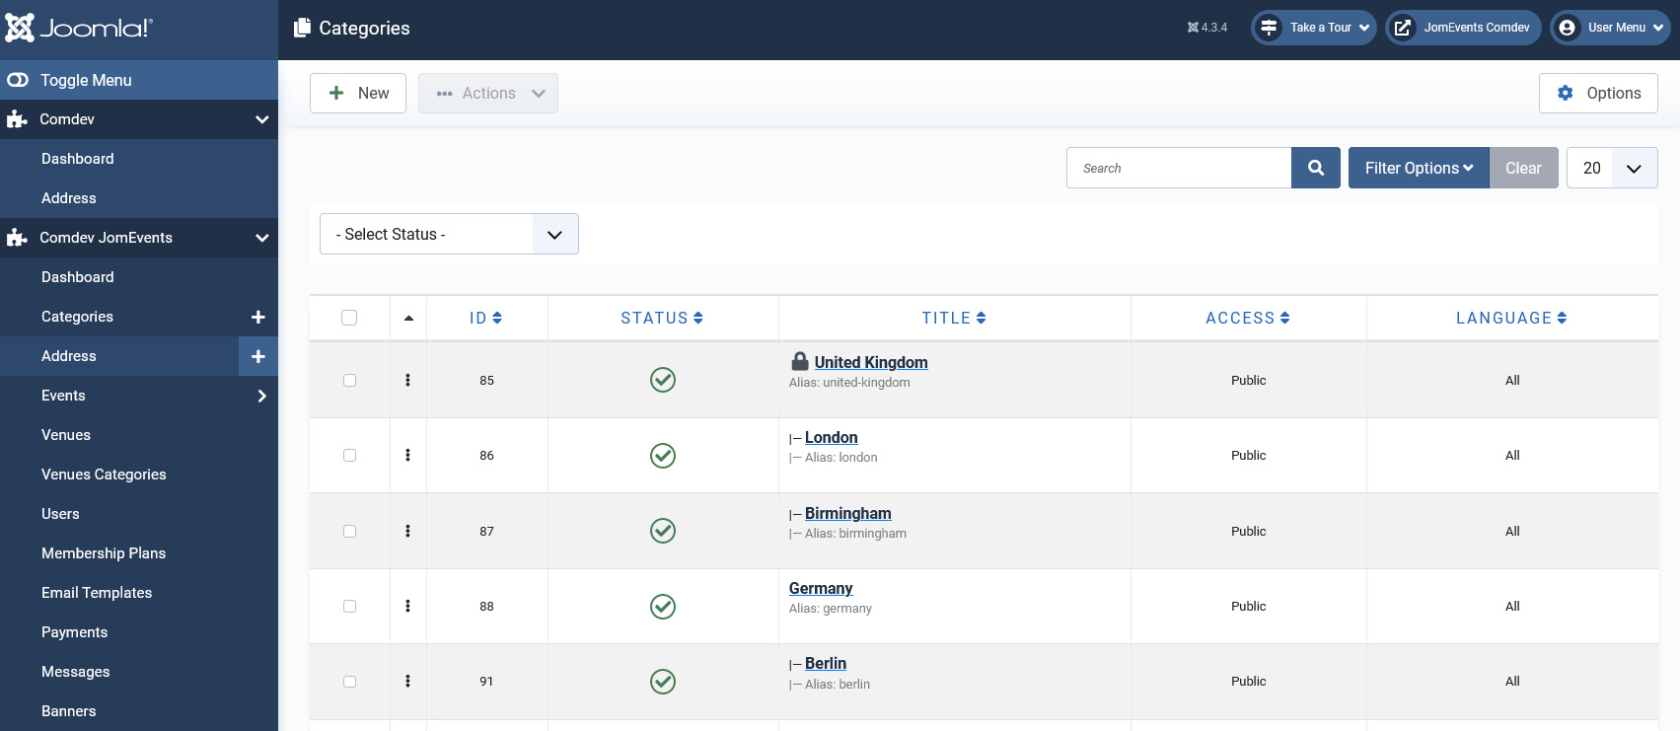
The following image shows the Address Feature screen. To add an address, click Components > Comdev > Address. Click New to create a new address.
Screen 1: New Address screen
Let us understand each of the buttons seen on the screen using the following table.
|
New |
Creates a new Address entry. You must create separate entries for each level of depth that you need. |
|
Edit |
Provides the edit mode to make changes to the existing level or titles created. |
|
Publish |
Publishes the created address entry. |
|
Unpublish |
Removes the entry from the list of published address entries |
|
Archive |
Archives address entries that are not used anymore. |
|
Trash |
Deletes the address entry that is not required anymore. |
|
Rebuild |
Refreshes to incorporate the changes made to the entries in the Address feature. |
Address Structure
The structure of the Address tree is maintained as follows in our example. You can create any structure as per your requirement.
<Continent>
-- <Country>
-- – <Region>
-- – -- <City>
Editing address entries
If you want to edit existing entries, you can either click the entry from the Address screen or select the check box next to the entry, and then click Edit.
After you click the required entry that you need to edit, you can change the configurations based on the options as seen in the following table.
|
Title |
Custom Address Field |
|
Alias |
URL alias for “SEF/SEO” URL |
|
Parent |
Select the parent address entry |
|
Text box |
Provide a description about the entry. You can format the text using the formatting options in the text box. You can also insert images or links to URLs for more information. |
|
Category Image |
Upload an address image |
Publishing tab
After you have provided the above information, you can provide the publishing information in the Publishing tab as seen in the following image.
You can change the values for the given options using the following table.
|
Status |
Based on the status seen here, the visibility changes as follows:
|
|
Access |
Access level for site users is as follows:
|
|
Language |
Select the language for the address entry. |
|
ID |
Address ID, which can be used in modules, plugins and menus. |
|
Created by |
User name who created the entry. |
|
Created Date |
Date when the entry was created. |
|
Modified by |
User name who modified the entry. |
|
Modified Date |
Date when the entry was modified. |
Metadata tab
The metadata tab is used to provide metadata information for a particular address entry. The options for this tab can be seen as shown in the following image.
You can change the values for the given options using the following table.
|
Meta Description |
Meta-description for search-engine listings. |
|
Meta Keywords |
Meta Keywords for the search-engine |
|
Author |
Content author metadata. |
|
Robots |
Robots instructions:
|


