**This link is also being used for the search results and filtering along with it's alias.**
If you use multilingual site, this link needs to be created for each listing
--- ### Some scripts are not loading, calendar is missing, images are not showing If you experience issues with certain components, such as scripts or images not loading, the most common cause is that the website is placed in a domain directory instead of the root of the domain or subdomain: ❌ Incorrect: [www.site.com/mysite](http://www.site.com/mysite) ✅ Correct: [www.mysite.site.com](http://www.mysite.site.com) --- ### Join membership does not work, when clicked on join button nothing happen Default membership group needs to be set in order for the membership join page work correctly, please check the following: 1. Membership groups has been configured correctly. 2. Default join group has been set under component Options -> Front Admin tab #### Membership group is empty, can't add membership New memberships cannot be added due to the membership group being empty. To resolve this, it is necessary to create a new Joomla group hierarchy. The process involves setting up a new group structure, with the extension name as the top level of the hierarchy (or subtree). This setup will ensure that memberships are properly assigned and managed under the correct group e.g. for JomEstate proper tree would be: [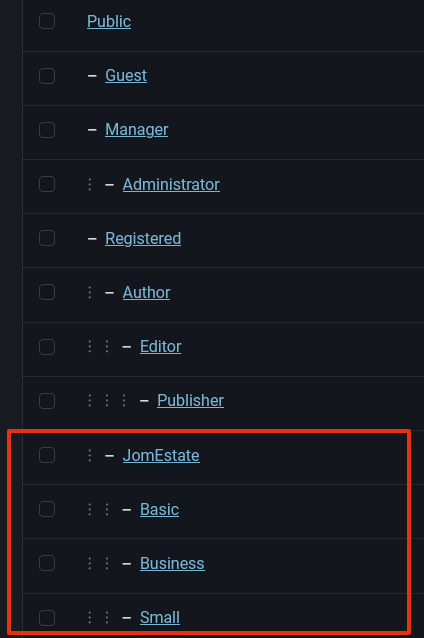](https://wiki.comdev.eu/uploads/images/gallery/2024-09/obraz.png) --- ### Date format changeFor example, if you want the date to display January 01, 2013, you would use : F j, Y
--- ### Can't post reviews, Ra-captcha problem ##### **For Joomla 5 and Re-captcha, please visit [Joomla 5 Re-captcha](https://comdev.eu/adding-captcha-to-joomla-5-a-comprehensive-guide/ "Joomla 5 recaptcha")** To complete this guide, you will need to go to the following Google URL to get a reCAPTCHA v2 “Site Key” and “**Secret key”: https://www.google.com/recaptcha/** The specific steps will differ based on the Google plan you are subscribed to. 1. Login to your Joomla Admin Panel. 2. Click the **Systems** link in the navigation menu. 3. Click **Plugins** under the *Manage* section. 4. Type ‘captcha’ in the search box then click the enter key or click the magnifying glass. 5. Next to “CAPTCHA – reCAPTCHA” click the **X** under *Status* to enable the extension. You will see an “*Extension enabled*” message.  6. Click the **CAPTCHA – reCAPTCHA** plugin link. 7. Enter your **Site Key** in the available field. 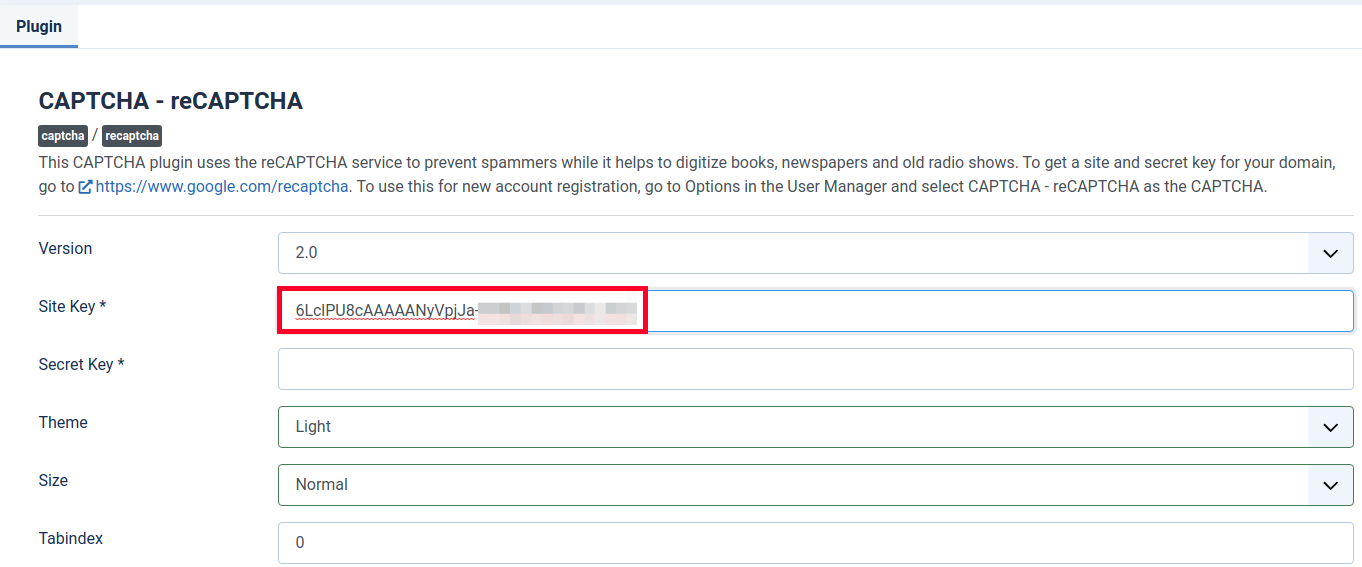 8. Enter your **Secret Key** in the next field. 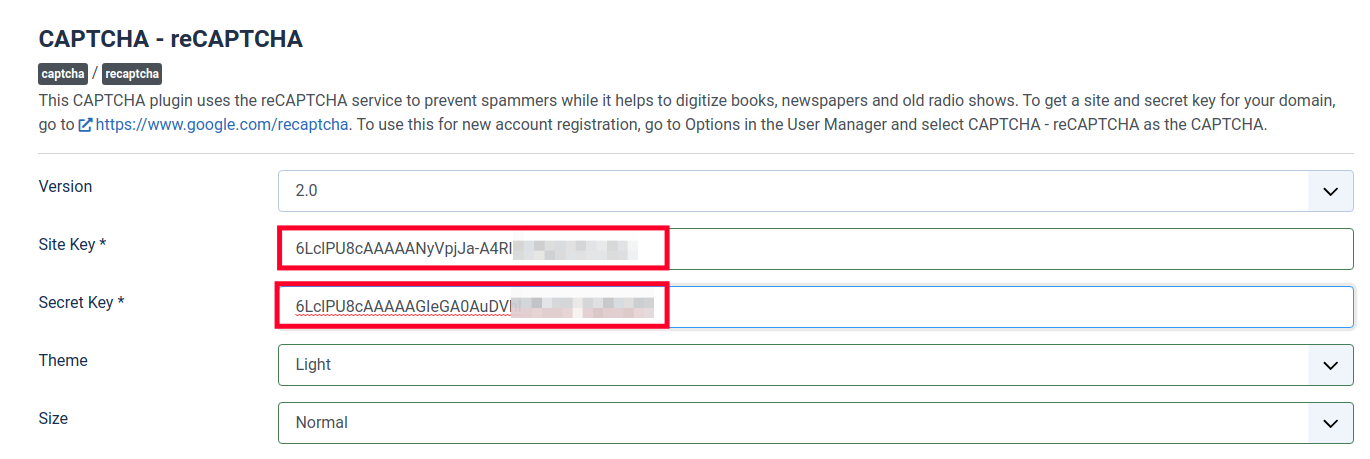 9. Click the **Save & Close** button. You are finished when you see a “Plugin saved” message. CAPTCHA is now setup and available to use on your Joomla site. In the next section, we’ll show you how to enable this ability globally --- ### How to Completely Delete a Listing in Joomla ##### Move the Listing to Trash - Find the listing you want to delete. - Select the checkbox next to it. - Click the **Trash** button to move it to the trash bin. #### Permanently Delete the Listing To fully remove the listing from your site: 1. Go to the **Trash** section (for Articles: Click "Search Tools" and select "Trashed"). 2. Select the listing again. 3. Click the **Empty Trash** or **Delete Permanently** button. #### Clear Cache To ensure the changes reflect properly, clear the cache: - Go to **System > Clear Cache** - Select all and click **Delete**