| **Name** | Name for the membership plan. |
|---|---|
| **Alias** | URL alias for “SEF/SEO” URL. |
| **Category** | Category where the listing will be published. |
| **Address** | Choose the address of the venue. |
| **Street, Number** | Enter the street address of the venue. |
| **User** | Select the JomEvents user for the venue. |
| **Status** | “Published” Items will be visible in the front-end. “Unpublished” Items will be invisible in the front-end but intended to be published. “Archived” Items are old items which are not ready for deletion yet. “Trashed” Items are old items that should be removed. |
| **Approved** | Choose if the Venue is approved or not (Y/N) |
| **Language** | Choose the language for the venue. |
| **ID** | This field is auto-populated. |
| **Description** | Type your description here, the functionality is the same as main Joomla articles. |
| **Article** | Click to select Joomla articles that are related to the venue. |
| **Image** | Click to select the images related to the venue. |
| **Toggle editor** | Click to toggle between rich text and plain text editors. |
| **Latitude** | It utilizes the GEO-location based on Google Maps. Provide the latitude information for the location mapping. |
| **Longitude** | The information provided in this field is used to map the exact location. It utilizes the GEO-location based on Google Maps. Provide the longitude information for the location mapping. |
| **Map Search** | Search for a specific location. Type in the location and press Enter to go to the exact location. |
| **Images** | **Add file area** | Add Files | Click to select the image that needs to be uploaded. |
| Drag & Drop Files Here | Drag a bunch of images to this area to upload multiple images. | ||
| Add available images & attachments | Click to add already uploaded images and attachments to this listing. | ||
| **Images area** | Editing an Image  | Click the  Edit icon to edit the image details. The options are as seen in the following image: 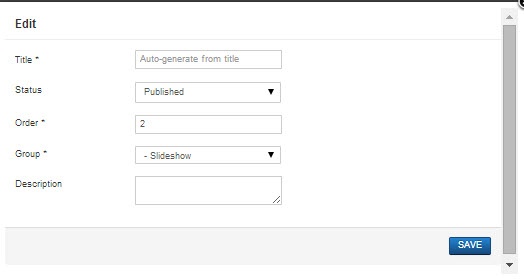 Click the  Delete icon to delete the image. | |
| **Attachments area** | Click the  Edit icon to edit an attachment that is linked to the listing. The screen is as shown here:

Click the  Delete icon to delete the attachment.
|
| **Created Date** | Date when the entry was created. |
| **Start Publishing** | Date when publishing needs to start in case of limited viewing of the field. |
| **Finish Publishing** | Date when publishing needs to stop in case of limited viewing of the field. |
| **Modified Date** | Date when the entry was modified. |