# Menu Items
### Overview
In this section, we will learn how to create menu items to access JomDirectory.
Menus are used to control website navigation and are a set of menu items. Menu items provide the navigational experience to your users. The menu items in our case must point to the JomDirectory.
### Creating Administration Menu Links
This step is not needed if new installation being made.
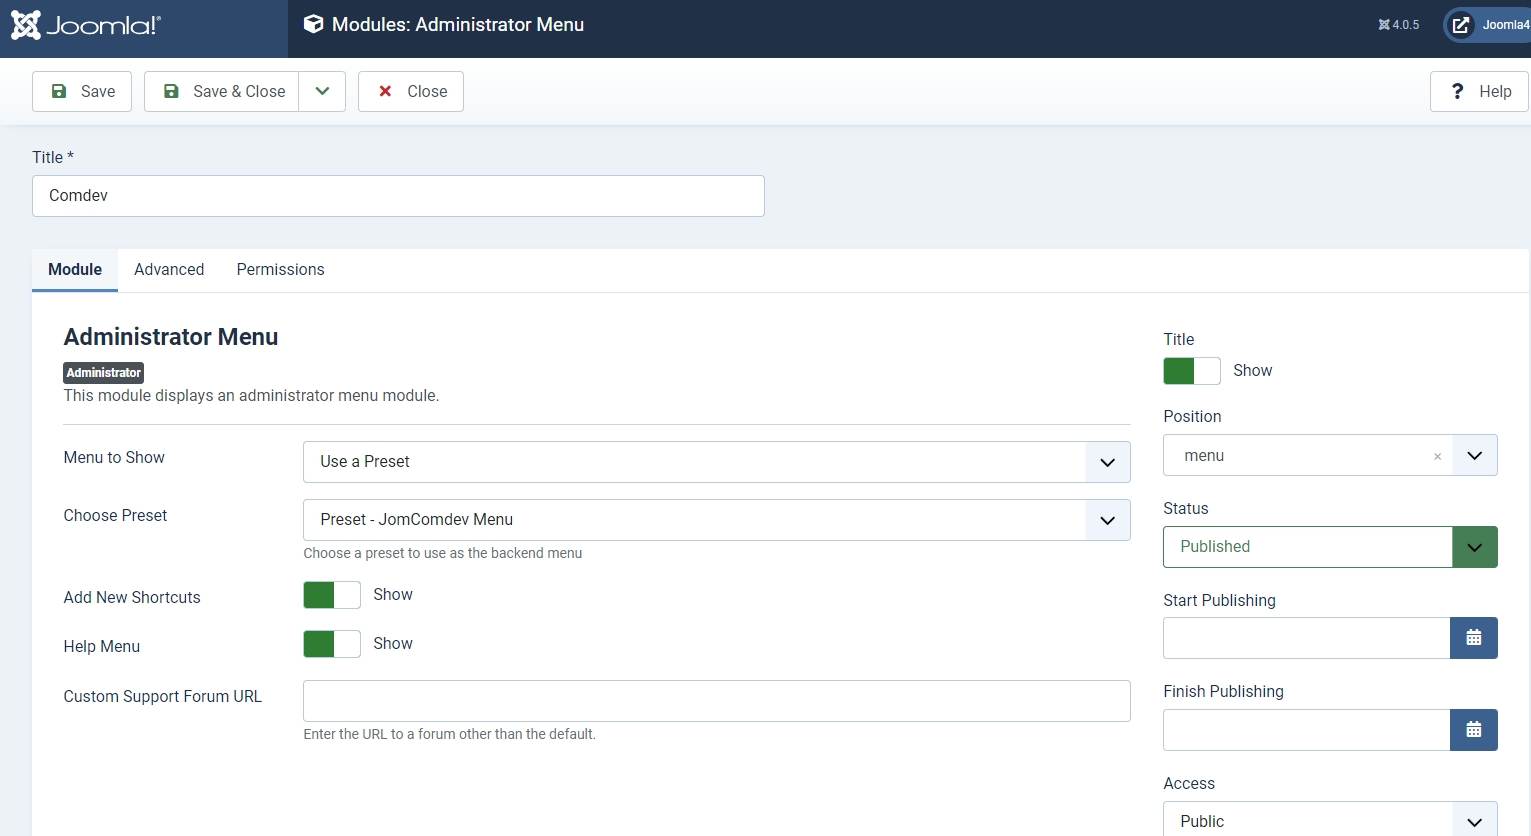
Go to the System -> Administrator modules and insert new. Than choose Administrator Menu. From the presets, select Comdev and place it under menu position. Do the same for the JomDirectory:
### Creating Menu Items to access JomDirectory
Creating an Items menu link is mandatory. If you have a multilingual site, ensure that you create an Items menu link for each language. You can hide this menu link, but it needs to be created nonetheless. Though you are creating an Items link that does not point to any category or address, you can create other links with Items menu type that can point to an address or a category once main Items link has been created.
To create menu items with Items menu item type, do the following:
1. Click **Menus** > **<your\_menu>** > **Add New Menu Item**.
2. Provide a title in our case is **Latest Listings** in the **Menu Title** field. Now, since the Latest Listings menu item provides a list of all the latest postings on the site, we have selected the menu type as Items. The Alias field will build URL for the site. When a search is done this will be the landing page for the search results as well.
3. Provide the options as seen in the following image:

**Screen 3:** Items menu item screen
4. Provide the values based on the following table.
5. Click **Save**.
Ensure that you see a green tick next to this menu item. The green tick indicates that the item is published. To publish an item, select the checkbox next to the item and click **Publish**.
To view the created menu item, go the front end of your site. The new menu item and it's alias is displayed and will be used for search results:
If you called it - Latest Items than search results page will be www.mydomain.com/latest-items.
If you do not create this menu search results URL will be: www.mydomain.com/components/jomdirectory
##### Create menu links for each category
It is very important to notice that listing details and proper URL's does not build if the category menu is missing (each category must have a link). You have to ensure that for each category on your site, you create a corresponding link in the Joomla menu. The best approach is to create a separate Joomla menu e.g. Categories and link each category there.
## 
### Creating Menu Items to access the Category Tree
The categories created in the component can be seen in the following format on the site depending on the layout selected.

**Screen 1:** Category page screen
For the Category screen to appear in your required format, you can edit the JomDirectory settings for that Menu item. The options seen for JomDirectory settings are as follows.
****
**Screen 2:** Category Tree menu item screen
The following table explains different options that you can edit.
### Creating Menu to access JomDirectory Front Admin
To create menu items with Front Admin menu item type, do the following:
1. Click **Menus** > **<your\_menu>** > **Add New Menu Items**.
2. Provide a title as **Front Admin** and the alias as **front-admin** in the Menu Title field.
3. Provide the options as seen in the following image:

**Screen4:** JomDirectory Front Admin menu item screen
4. Click **Save**.
#### Front Admin Options
For the Menu to be able to access the JomDirectory Front Admin, certain settings need to be made. The following table shows the three menu links that need to be made and linked with JomDirectory Options. You can create these 3 menu items anywhere on the site e.g. link them under User Menu.
**Now link menus with JomDirectory Options**:
Make the following settings for the Front Admin are made in the JomDirectory options for the user to be redirected correctly to the Front Admin, when he is not logged in.
1. Click **System** > **Control Panel**.
2. Under **Extensions**, click **JomDirectory**.
3. Click **Options** in the top right-hand corner of the screen.
4. Click the **Front Admin** tab.
5. Change the **Profile Menu Link**, **Login Menu Link**, and **View Profile Menu Link** field as per the following image.

**Screen5:** JomDirectory Front Admin options
6. Click **Save**.
The Front Admin lets users add listings in the front of the site. For more information about how to add listings, see [Front Admin](https://wiki.comdev.eu/display/JD2/Front+Admin).