User Guide
- Front Admin Overview
- Manage Listings
- Manage Reviews
- User Membership
- Listings Messages
- Profile & Settings (User Profile)
Front Admin Overview
Overview
The dashboard gives a quick snapshot of all the tasks that you can perform using the Front Admin. It also provided multiple menu items that you can use to create listings, view listings, view membership plans, and so on. The other options that you can control are approving reviews, viewing statistics, upgrading membership for a particular user, and so on.
Accessing the dashboard
When you access the home URL for JomDirectory extension, do the following:
- Click Front Admin.
- Provide the login details for the required user and click Submit.
The dashboard with various options can be seen as shown in the following image.
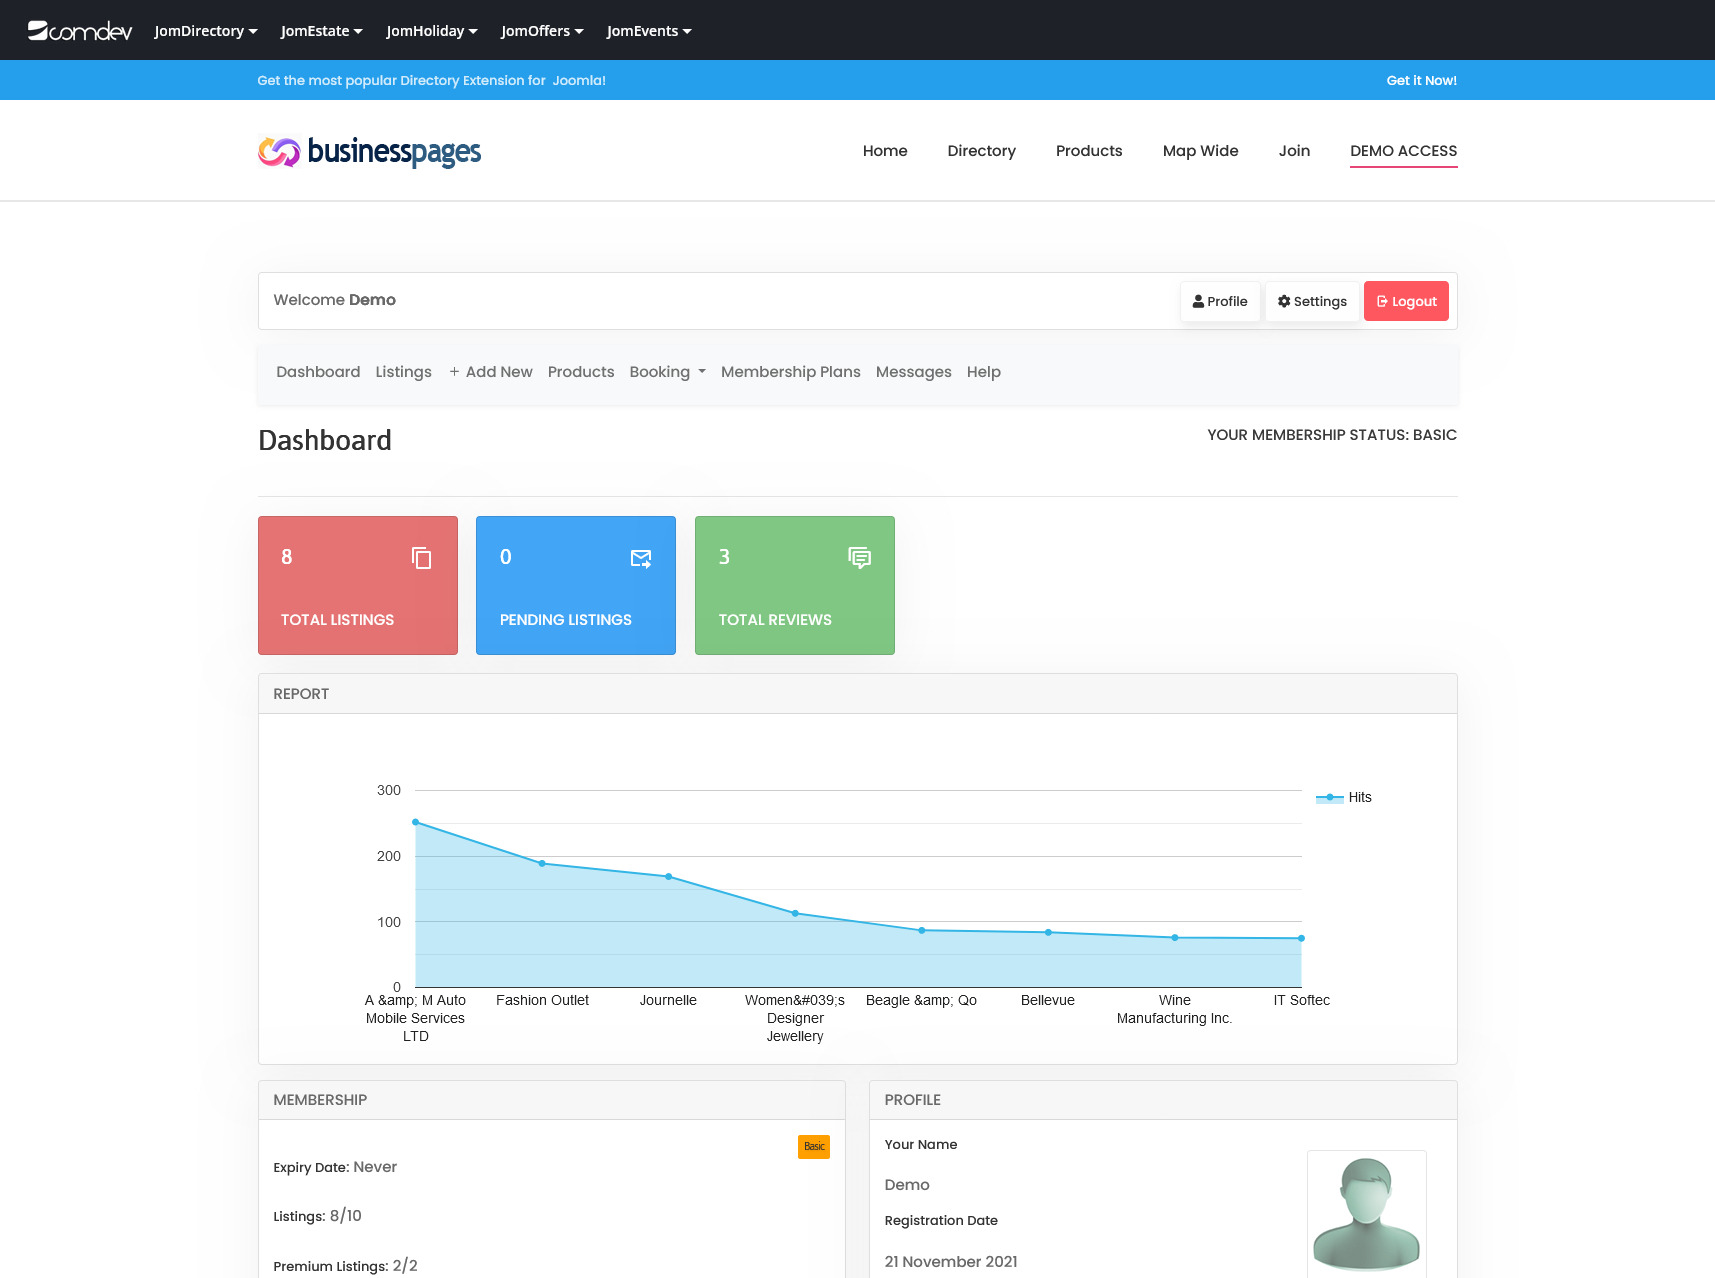

Screen 1: Dashboard screen
You can click the options as seen in the following table.
Listing stats |
Shows the general statistics about the listings |  |
Report |
Most Viewed graph |
View the statistics for the site based on the listings viewership. |
Membership |
Upgrade Your Membership NOW! |
Upgrade to another membership plan. Click Upgrade on the plan tab for the plan you want to upgrade to as shown here.
|
Profile |
Profile |
View the profile details for your profile. |
Approve Comments |
|
Click the review to see the listing page it applies to. To approve a listing, select the check box next to the review comment and click Approve. If you want to delete the comment, click Delete.
Approve comments appears only when enabled under JomDirectory Options -> Front Admin settings
|


Manage Listings
Overview
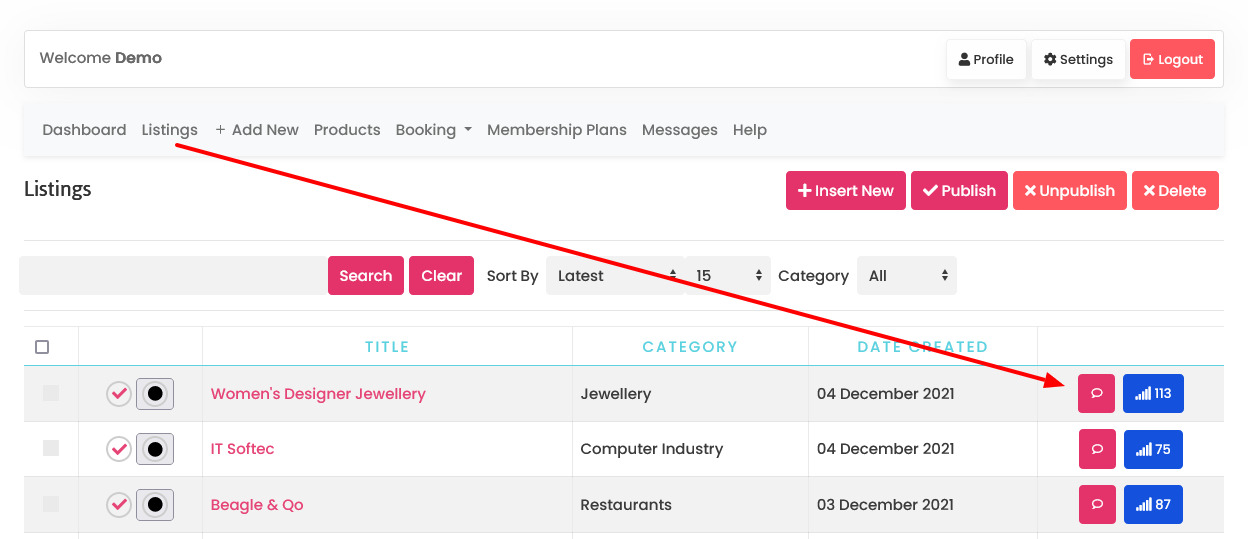
You can view all the listings created for your site or create a new listing. The created listings let you add descriptions, images, provide ratings, and much more.
Creating a New Listing
The following image shows the Listings screen.


Screen 1: Listing screen
The following table explains the different options seen on the screen.
|
Button |
Usage |
|
Insert New |
Creates a new Address entry. You must create separate entries for each level of depth that you need. |
|
Publish |
Publishes the created address entry. |
|
Unpublish |
Removes the entry from the list of published address entries |
|
Delete |
Deletes the address entry that is not required anymore. |
Manage Reviews
Overview
Users can provide reviews about the listing that can be viewed on the Listing page under the Reviews tab. This review will need to be approved by the owner of the listing before it can be seen under this tab.
Viewing Reviews
After logging into the Front Admin, click Listings. You can see the available listings. Each listing has an ![]() icon that takes you to the Reviews page.
icon that takes you to the Reviews page.
 Screen 1: Reviews
Provide the options as seen in the following table.
|
Approve |
Select the review you want to approve, and then click Approve. |
|
Unapprove |
Select the review you want to unapprove, and then click Unapprove. |
|
Delete |
Select the review you want to delete, and then click Delete. |
|
|
Click to publish the review. |
|
|
Click to unpublish the review. |


User Membership
Overview
You can view the user membership plan details on the Front Admin page. If eligible for, you can also upgrade the user membership plan to a higher plan.
User membership plan can not only be upgraded through the Front Admin. You can perform other membership tasks from the back end using the information given in the
The following screen shows the Membership details for the user.
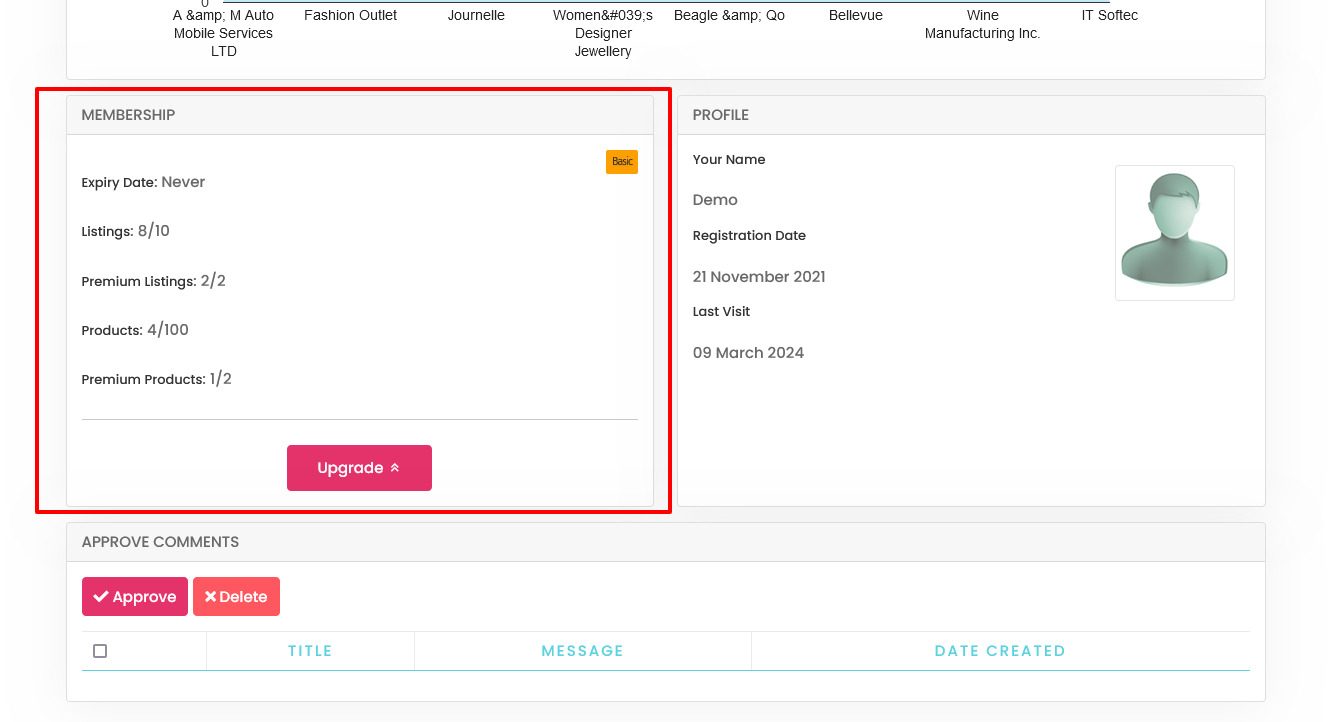

Screen 1: Membership details
To upgrade the user membership plan you can either click Upgrade or click the Membership tab on the Front Admin page. The membership plans that are available for upgrade are shown as seen in the following image.
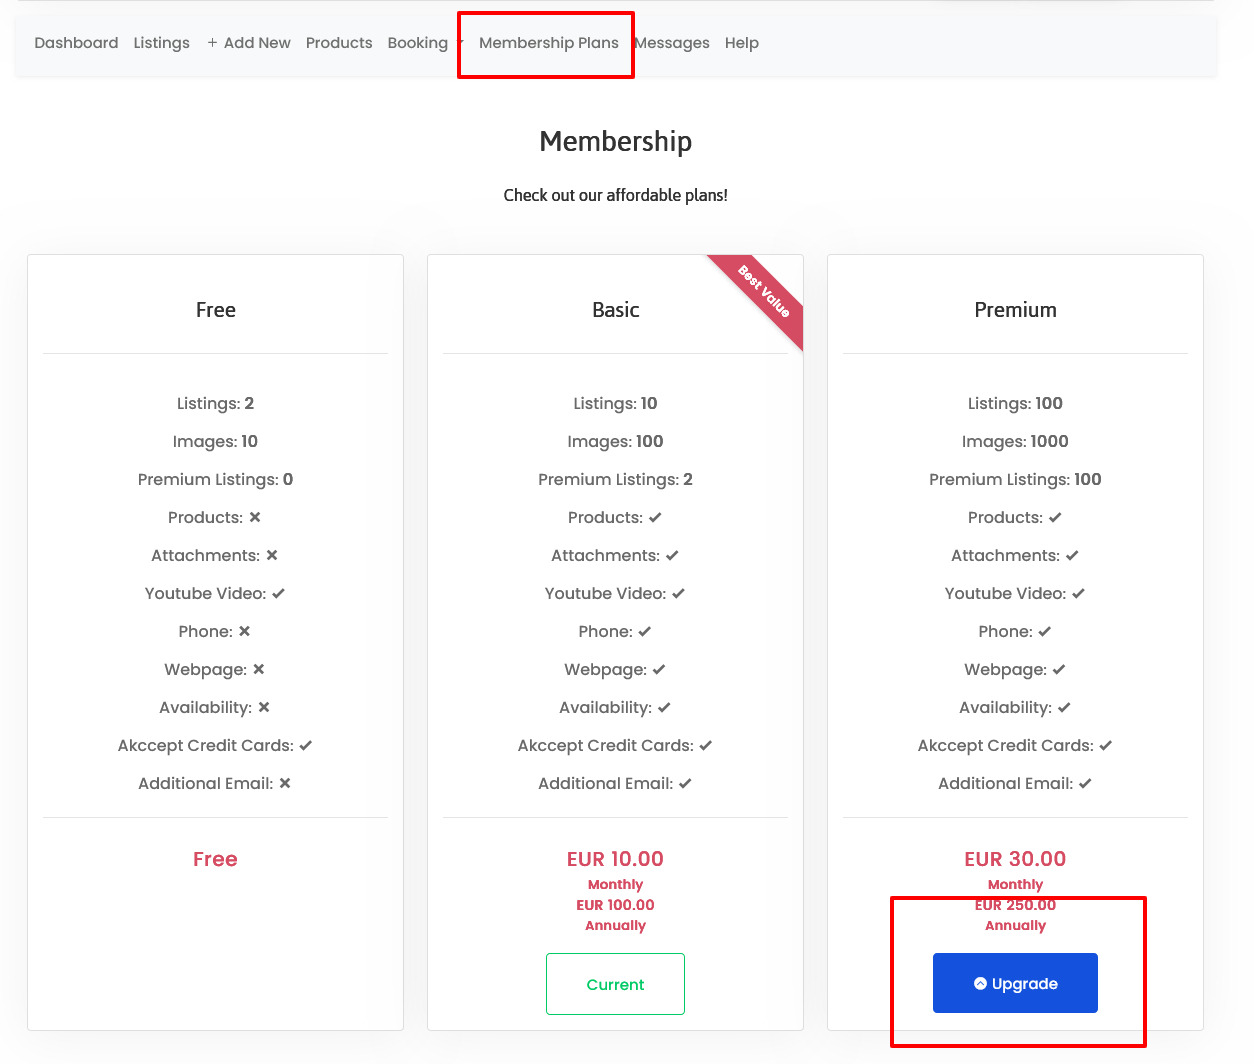

Screen 2: Membership plans
Click Upgrade to upgrade to the higher plan. You can then select an appropriate mode of payments and complete the transaction.
Listings Messages
Overview
Additional send email copy to admin can be set under Configuration
The messages are always sent to the owner of the listing. The user email address is taken from the User Account settings.
The Contact area on the listing page is as seen in the following image. The options are provided as given here:
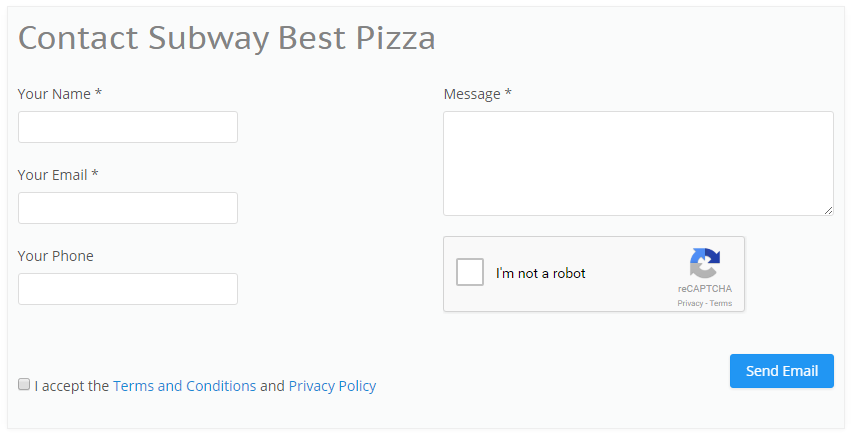
Screen 1: Sending a message on the site
Viewing messages
Once the user accepts the Terms and Conditions and the Privacy Policy, he clicks Send Email. The email is now available for the owner of the listing to view as seen in the following image:
To view a message, hover the mouse pointer over the message as shown in the following image.
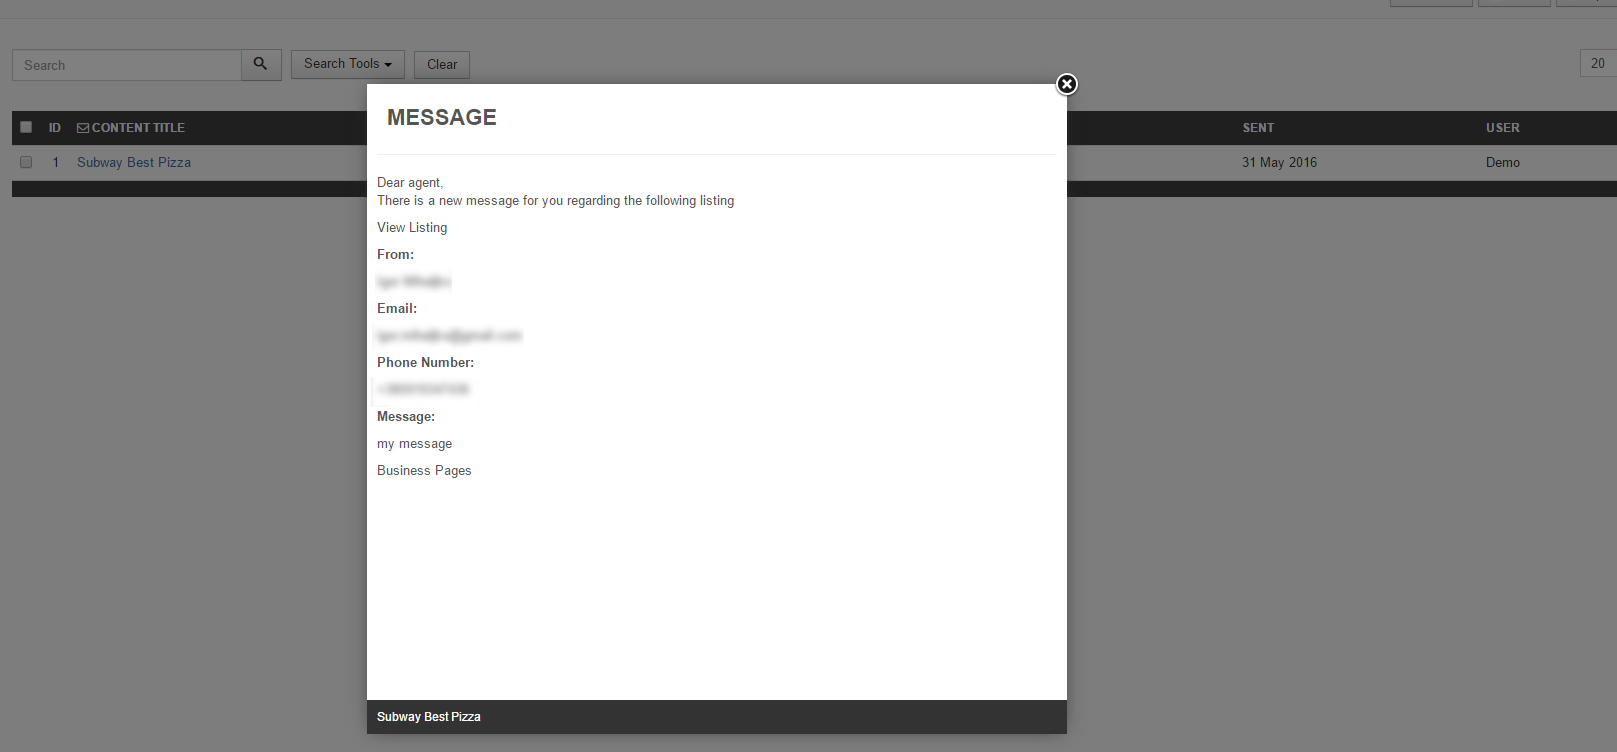
Screen 2: View the message
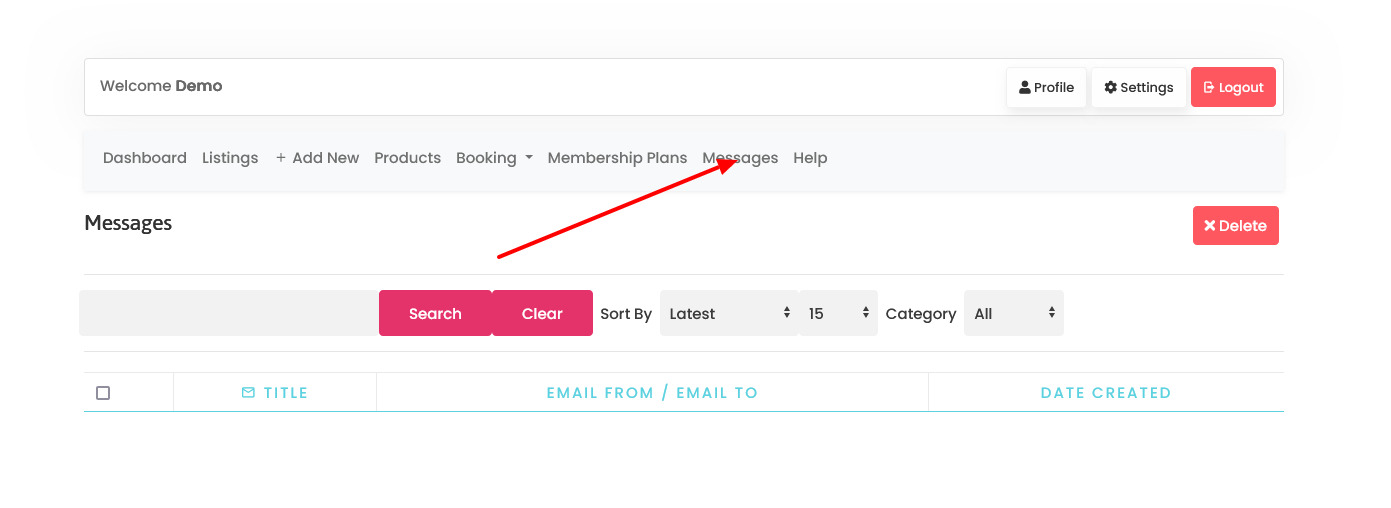
Messages sent using the contact form are available on the Messages tab for the owner of the listings. You can view the message or delete it based on your requirement.
Front Admin Messages
To view messages, from Front Admin, click the Messages tab to see the following screen.
Profile & Settings (User Profile)
Overview
After creating a user, a user can edit his profile details such as password, email address, language settings, timezone settings, and much more.
To edit your profile, from the Front Admin, click Profile as shown in the following screen.
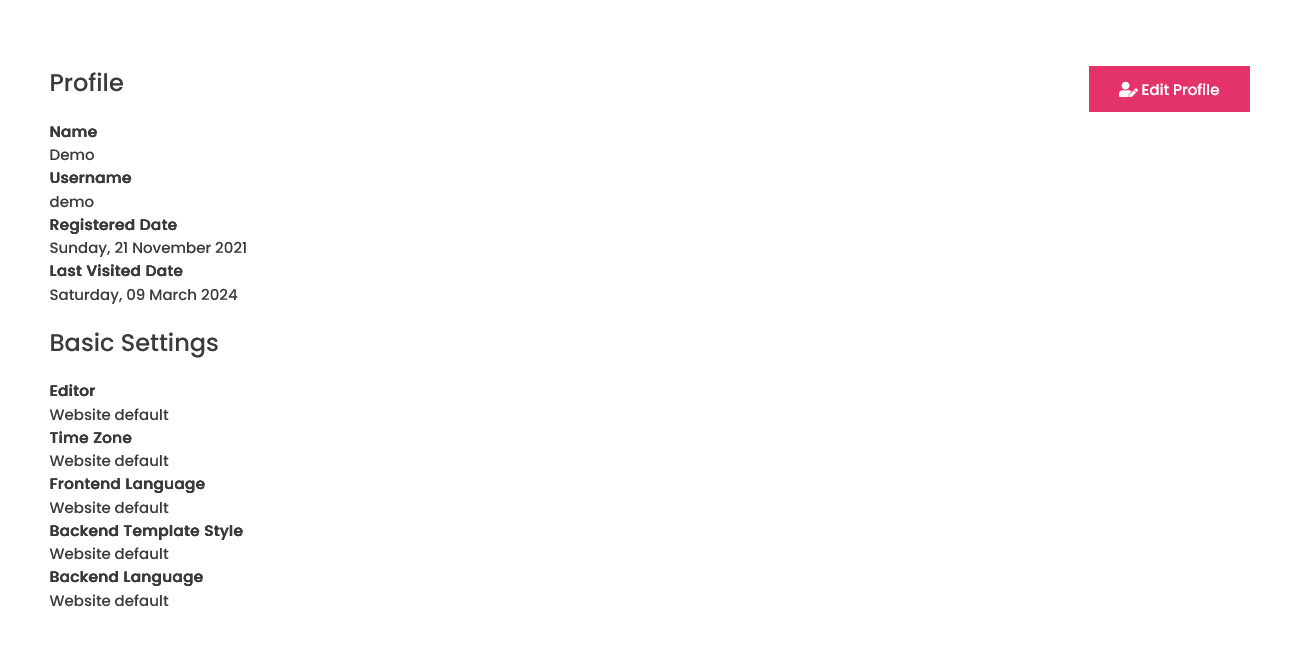

Screen 1: Profile screen
Editing a profile
On the Profile screen, click Edit Profile as shown in the following screen.
Provide the values as given in the following table.
Edit Your Profile |
Name |
Provide a name. |
|
|
Username |
Cannot be edited. |
|
|
Password |
Provide a new password. |
|
|
Confirm Password |
Confirm the new password. |
|
|
Email Address |
Provide a new email address. |
|
|
Confirm email Address |
Confirm the new email address. |
Basic Settings |
Editor |
Select one of the following:
|
|
|
Timezone |
Select a timezone. |
|
|
Frontend language |
Select the required language for front end. |
|
|
Backend Template Style |
Select from the available templates or keep as default. |
|
|
Backend language |
Select the required language for back end. |
|
|
Help Site |
Select from the available Help site options for your required language. |
Additional Options |
Logo |
Additional fields defined in User - profile Joomla plugin |
To save the settings you changed, click Submit. If you click the Settings link on the Front Admin screen, it will take you to the Edit Profile page.