Modules
- Latest Items Module
- Search Module
- Shopping Cart Addon Module
- Live Search Maps Module
- Slideshow PRO Module
Latest Items Module
Overview
Modules are extensions that assist in creating blocks of information on your site. They aggregate information from components and can be placed in predefined positions on the page based on your Joomla template.
JomDirectory Latest module
This module helps you create the panel where latest listings are displayed. You can decide where to position the latest panel on the page and also control on which pages the panel should appear. To view all the available modules, click Extension > Module Manager. The modules available are listed as seen in the following image.
Editing the JomDirectory Latest module
To edit the module, click on the module link or select the checkbox next to the module name, and then click Edit.
The following image shows the module edit screen.
Module tab
This tab controls the layout where the latest listings panel is to be displayed on the screen.
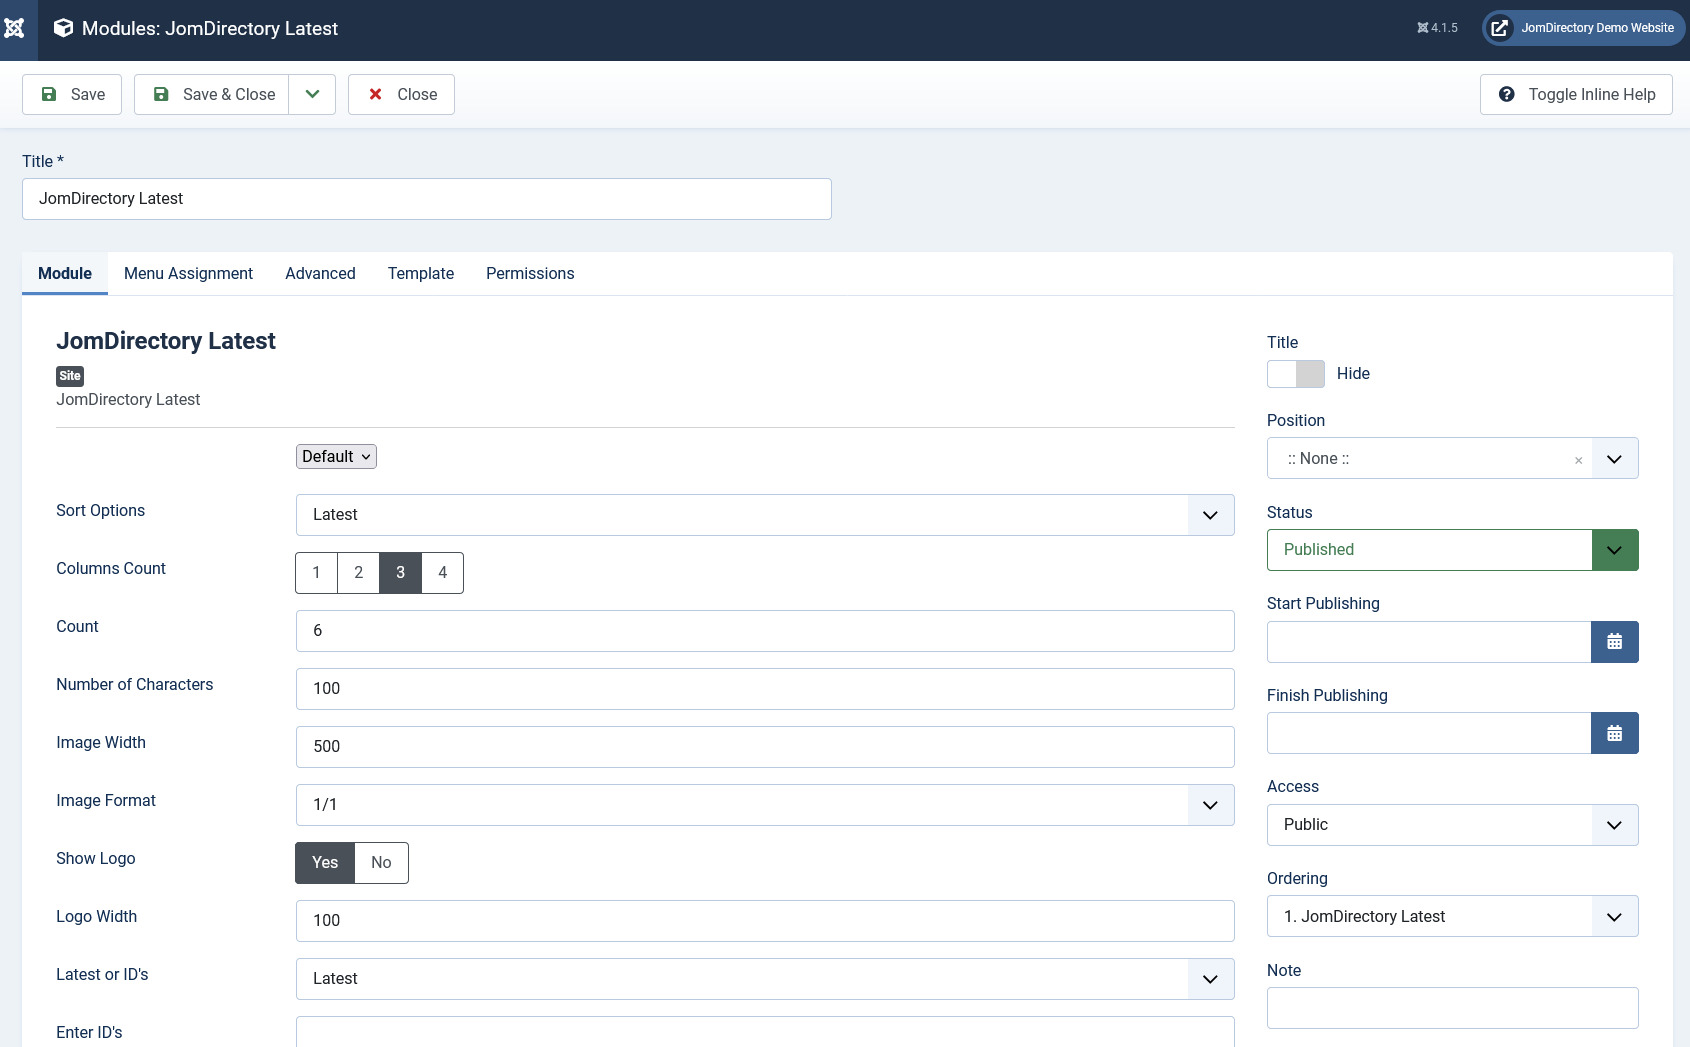
Screen 8: Module tab
Provide the options as per the following table.
|
Layout |
Select the required layout in the Layout field. The available options are:
|
| Columns count | Number of columns of listing that should be listed in the panel |
|
Count |
Number of listings that should be listed in the panel. |
|
A number of Characters |
Number of characters that will be displayed in the short description for listing thumbnail. |
|
Image Width |
Provide the image width for the thumbnail image. If Slider Layout set, image width must be the same size than Slider Width or larger.
|
|
Image Format |
The format for the thumbnail listing image. |
|
Latest or IDs |
Select how you want the listings to be displayed as:
|
|
Enter IDs |
If ID is selected in the column above, mention the starting ID of the listing. |
|
Featured |
Enable to show only featured listings. |
|
Show Address |
Enable to show the address of the listing. |
|
Show Description |
Enable to show the description up to the character limit set. |
|
Category |
Enable either of the following options.
|
|
Choose Category |
If Selected Below is selected for the above field, select the required category. |
|
Sort Options |
Select how the displayed listings should be sorted by.
|
|
Slider Settings |
Heading |
|
Slider Width |
Slider width in pixels |
|
Slider Height |
Slider height in pixels |
|
Slide Delay (seconds) |
Slideshow delay in seconds |
|
Slider Shadow |
Enable to provide the shadow effect. |
|
Slider Thumbs |
Enable to show image thumbnails |
|
Slider Caption |
Enable to show the image caption. |
|
Show Title |
Show or hide the title for the search panel. |
|
Position |
Select the position based on your Joomla Template. |
|
Status |
Select from the given options.
|
|
Start Publishing |
Provide a date when the latest listings panel should be published. |
|
Finish Publishing |
Provide a date when the latest listings panel should be unpublished. |
|
Access |
Provide access level for the panel.
|
|
Ordering |
Provide the order in which the side panel should appear. If more than one module is positioned at the same location, you can set the order of appearance in this field. |
|
Language |
Select the language for which you want to display this panel. For each language, you must create a new JomDirectory Latest module. |
|
Note |
Provide additional information. |


Menu Assignment tab
This tab controls where the module should be displayed. You can decide if it should be displayed on all pages for the site or just selective pages.

Select the required menu for module assignment. The available options are:
- On all pages
- No pages
- Only on the pages selected
- On all pages except those selected
Search Module
JomDirectory Search module
This module helps you create the search panel with fields that are searchable. All the fields that are defined as searchable during creation can be seen on this panel. You can decide where to position the search panel on the page and also control on which pages the panel should appear. To view all the available modules, click Extension > Module Manager.
To create a new module, click New. Select the JomDirectory Search module. Provide the information as given in the following sections. Click Save to save the module.
Editing the JomDirectory Search module
To edit the module, click on the module link or select the checkbox next to the module name, and then click Edit.
The following image shows the module edit screen.
Module tab
This tab controls the layout where the search panel is to be displayed on the screen
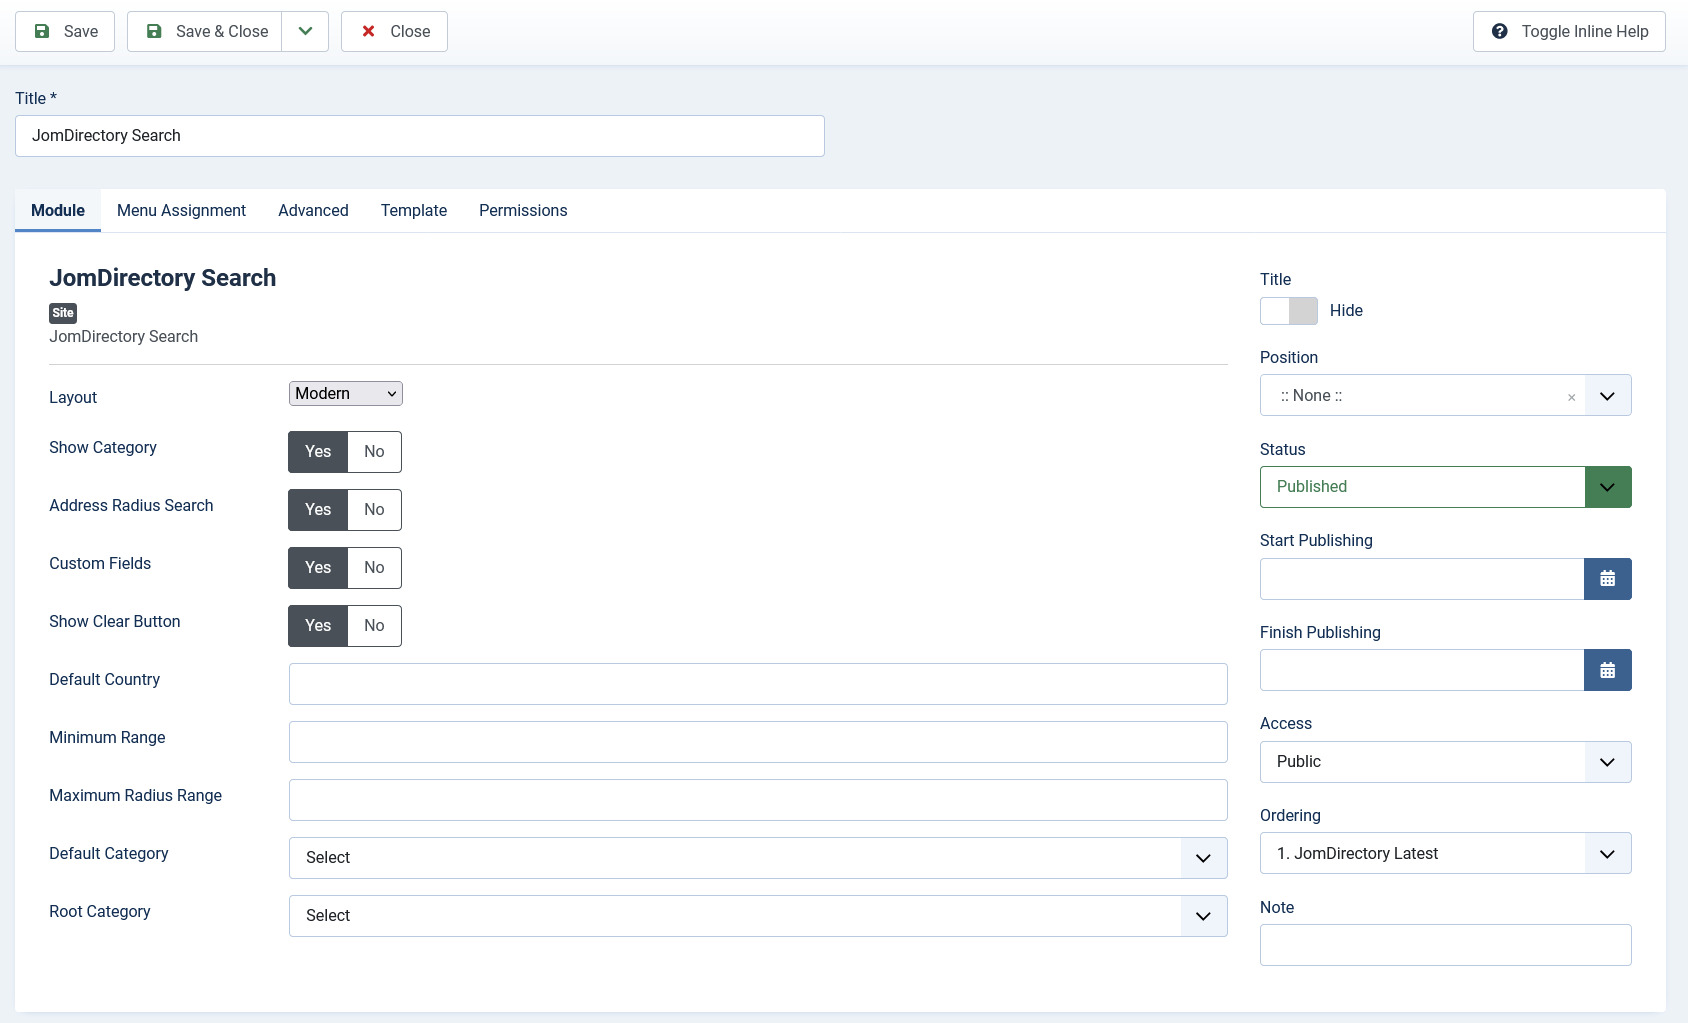
Screen 3: Module tab
Provide the options as per the following table.
|
Layout |
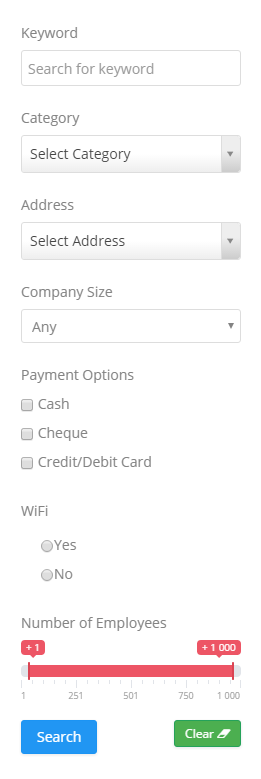
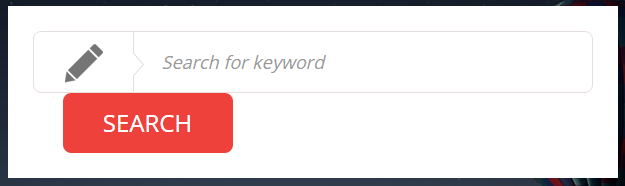
Select the required layout in the Layout field. The available options are:
Custom fields that have the Field can be Searched field enabled are seen in this panel. For more information, see Custom Fields in the Administrative Guide.
|
| Show Address | Hide or Show the address field in the frontend |
| Show category | Hide or Show category selection in the frontend |
| Custom Fields | Select if search should process custom fields |
| Default category | Select a default category that will be preselected in the frontend |
|
Show Title |
Show or hide the title for the search panel. |
|
Position |
Select the position based on your Joomla Template. |
|
Start Publishing |
Provide a date when the search panel should be published. |
|
Finish Publishing |
Provide a date when the search panel should be unpublished. |
|
Access |
Provide access level for the panel.
|
|
Ordering |
Provide the order in which the side panel should appear. If more than one module is positioned at the same location, you can set the order of appearance in this field. |
|
Language |
Select the language for which you want to display this panel. For each language, you must create a new JomDirectory Search module. |
|
Note |
Provide additional information. |

Menu Assignment tab
This tab controls where the module should be displayed. You can decide if it should be displayed on all pages for the site or just selective pages.
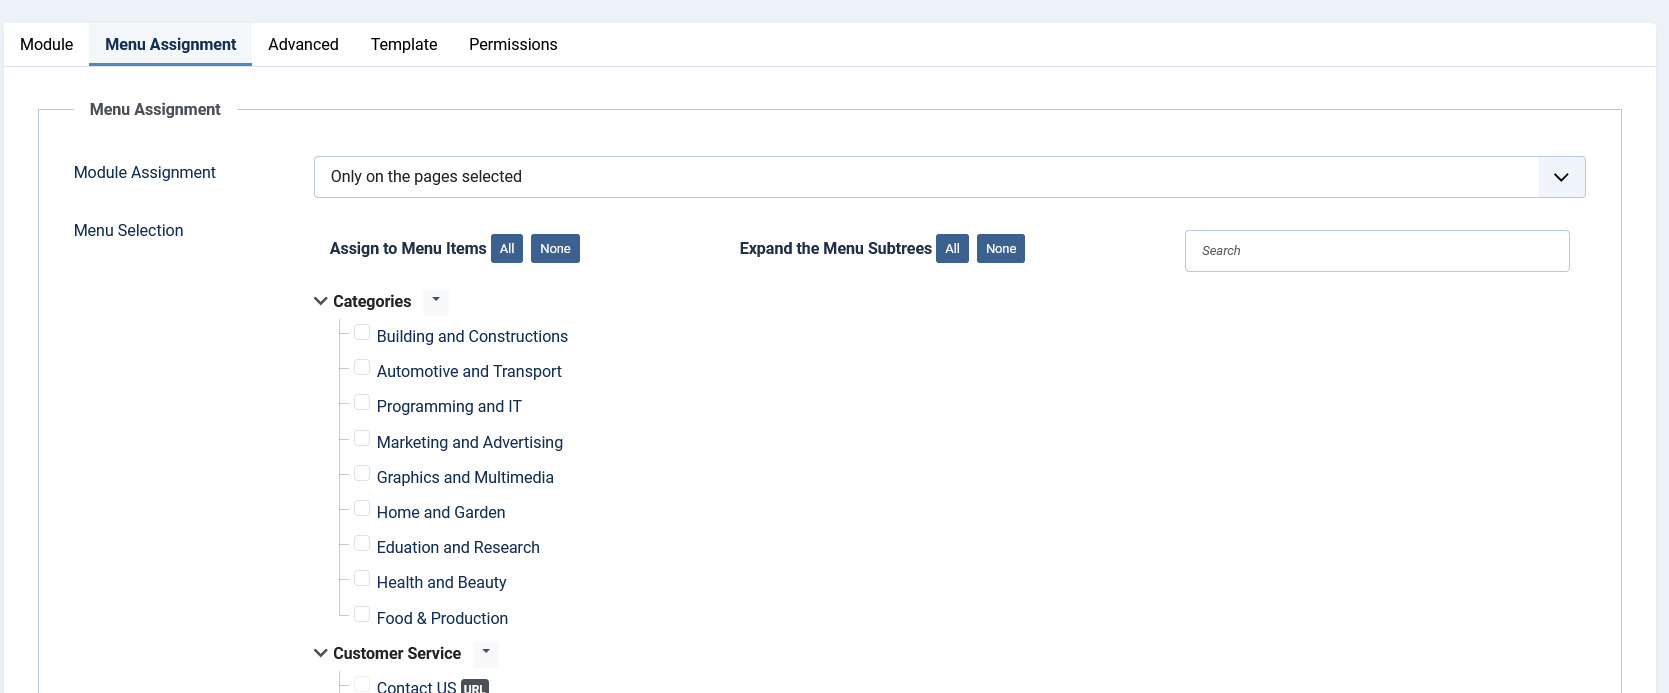
Select the required menu for module assignment. The available options are:
- On all pages
- No pages
- Only on the pages selected
- On all pages except those selected
Shopping Cart Addon Module
JomDirectory includes a shopping cart and checkout, so users can purchase items straight from your product catalogue. Shopping cart addon extends Products functionality by adding possibility to purchase products directly on the list or from the product details page. When addon is installed a new section Orders will appear where all purchases are being logged and also Order status can be changed.
Installing the Shopping Cart Module
The shopping cart module does not need to be installed in order for users to be able to make purchases. However, it does make it easier for users to keep track of their purchases and navigate to checkout.
Start by downloading the shopping cart module. Once downloaded, install the module using Joomla's Extension Manager. Atlernatively, you can install directly from the web.
Configuring JomDirectory's Checkout
The first thing you must do is enable JomDirectory's checkout otherwise users will not be able to add items to the shopping cart and checkout those items for purchase.
To configure JomDirectory's checkout:
- Log into the Joomla! administration control panel then navigate to the JomDirectory dashboard (Components -> Directory),
- Click on the Options button (top right corner),
- Select Product from the list of tabs,
- Change Enable Cart to Yes,
- Save & Close.
Configuring the Module
Once the JomDirectory shopping cart module has been successfully installed, you will need to configure, position and publish it.
The JomDirectory shopping cart is just like any other module and so many of the configuration options will look familiar. Go through the options and configure it to you liking. In particular, configure the position and menu assignment and make sure that Status is set to Published.
IMPORTANT: Cart module should be assigned on all menus related to products!
Adding a Checkout Menu Item
If you have enabled the shopping cart module, you MUST create a shopping cart checkout page menu item otherwise the View Cart button will not work.
- Log into the Joomla! administration control panel if you haven't already,
- Navigate to the Menu Manager (Menus -> All Menu Items or select the menu you wish to add the item to),
- Click on New,
- Specify a menu item of "Shopping Cart",
- Configure your menu item to your liking,
- Save & Close.
If you are unfamiliar with Menu Manager check out Joomla!'s menu management documentation.
Configure Shipping Providers
Shipping Providers can be configured under custom fields. To create a new shipping provider, access Product custom fields, click create new, field type input and choose group shipping. Once saved it will be available under Product custom fields.
Configure Online and Offline payments.
- Log into the Joomla! administration control panel then navigate to the JomDirectory dashboard (Components -> Directory),
- Click on the Options button (top right corner),
- Select Payments from the list of tabs,
- Configure online and if needed offline payments
- Save & Close.
Purchasing a Product
That's it! You're ready to start selling your goods.
Live Search Maps Module
Overview
This is an extra paid module available for Business Package, can be also purchased separately.
This module helps you view all the listings under full view or windowed map To view all the available modules, click Extension > Module Manager.
To create a new module, click New. Select the EXTENSION_NAME Maps module. Provide the information as given in the following sections. Click Save to save the module.
Editing the Maps Module
To edit the module, click on the module link or select the checkbox next to the module name, and then click Edit.
The following image shows the module edit screen.

Screen 2: Module tab
Module tab
This tab controls the layout where the search panel is to be displayed on the screen.
Screen 3: Module tab
Provide the options as per the following table.
|
Layout |
Select the required layout in the Layout field. The available options are: Maps Wide – layout with the search module on the left side and big map area on the right side, as seen in the following image: 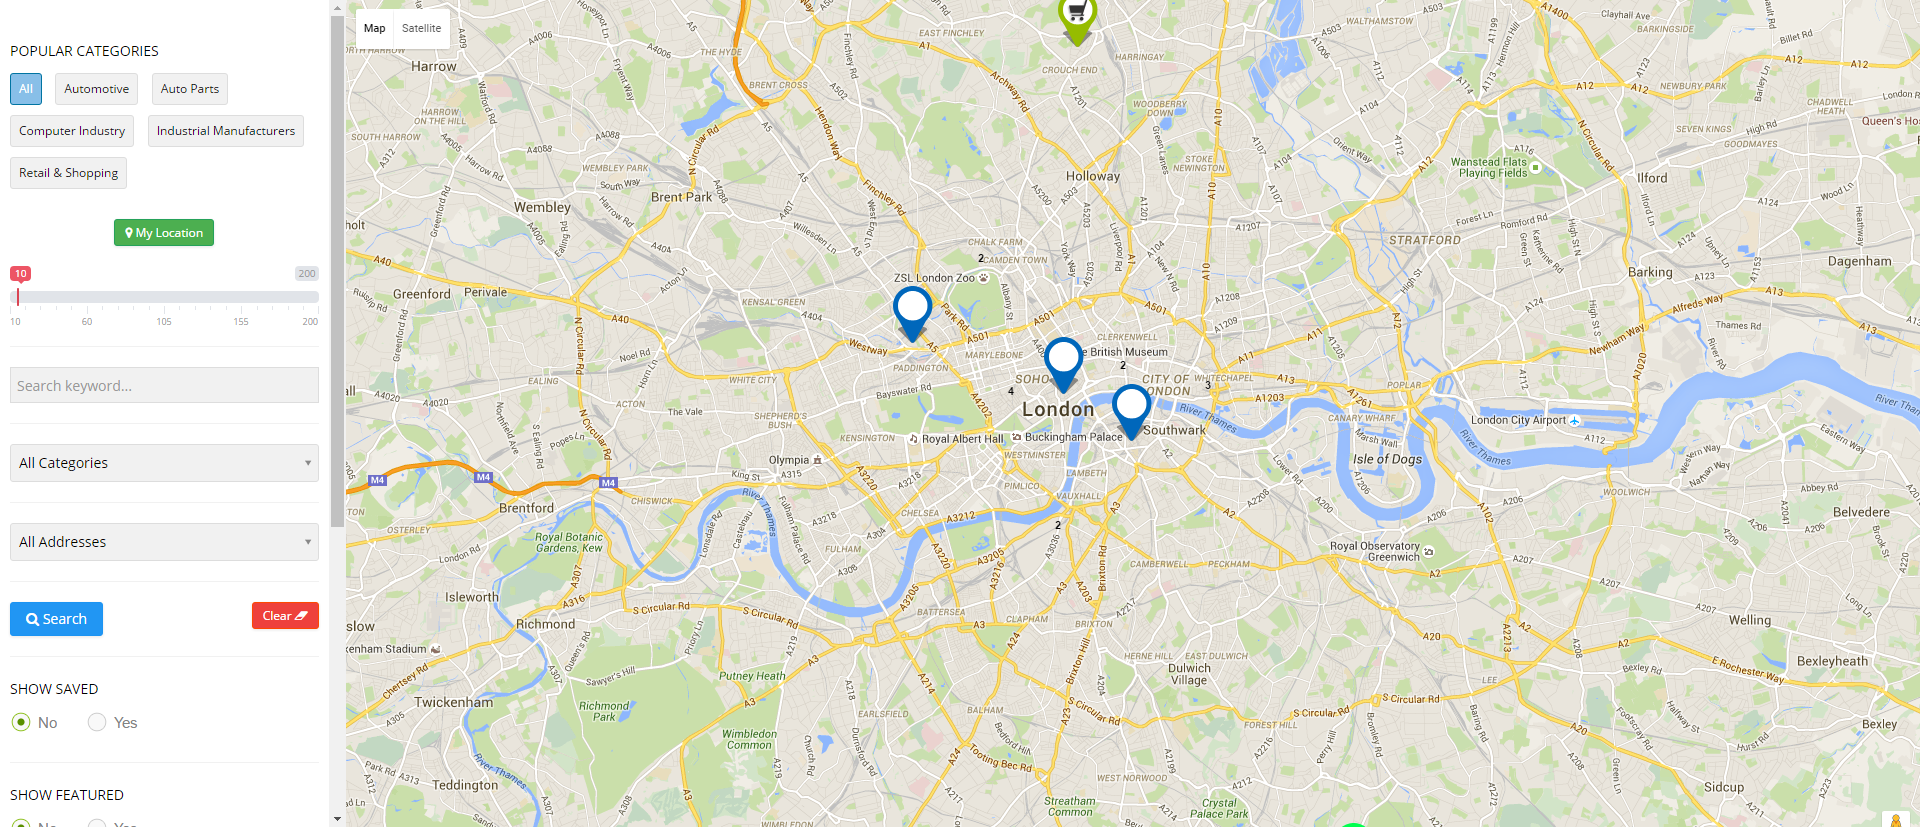
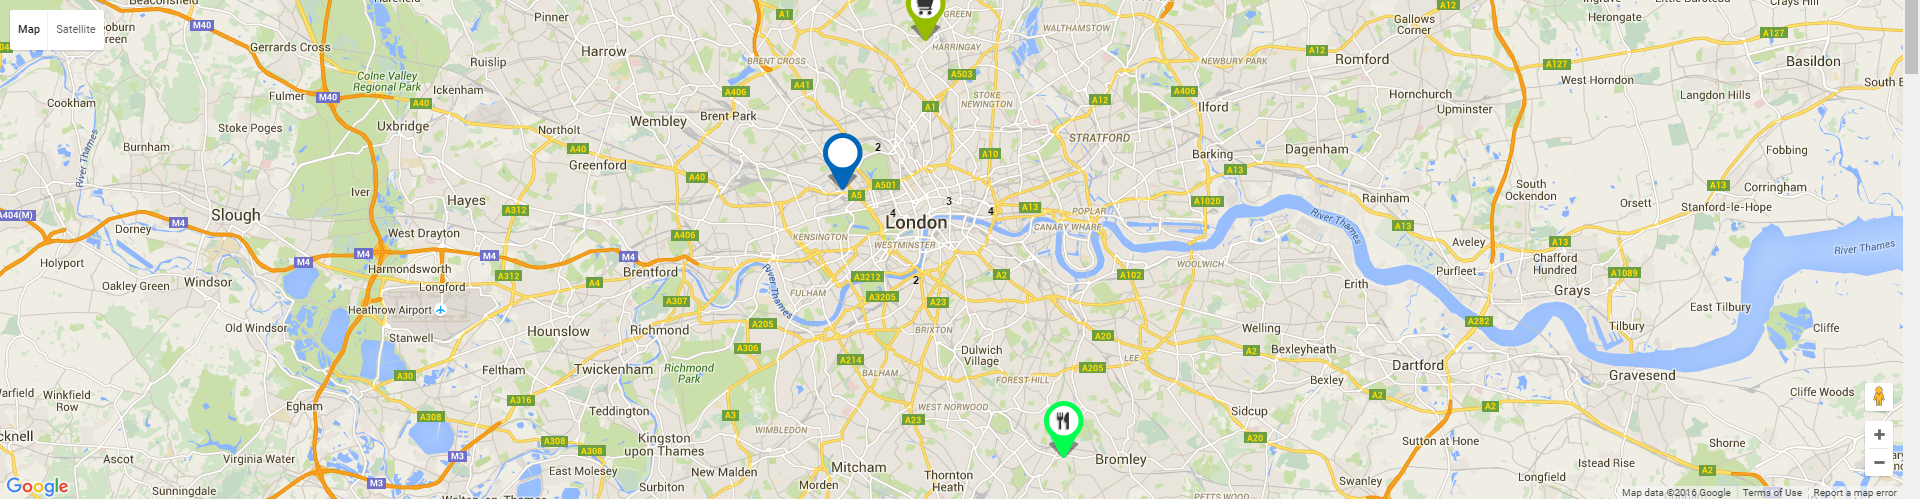
Maps – layout showing items on a map as seen in the following image: |
| Display limit | Limit number of items shown on the map |
| Map width | Set width of the map |
| Map height | Set height of the map |
|
Top margin |
Set top margin of the map |
|
|
Display category selection on the left of the wide map layout |
|
|
Display address selection on the left of the wide map layout |
|
|
Display keywords selection on the left of the wide map layout |
|
Position |
Select the position based on your Joomla Template. |
|
Start Publishing |
Provide a date when the search panel should be published. |
|
Finish Publishing |
Provide a date when the search panel should be unpublished. |
|
Access |
Provide access level for the panel.
|
|
Ordering |
Provide the order in which the side panel should appear. If more than one module is positioned at the same location, you can set the order of appearance in this field. |
|
Language |
Select the language for which you want to display this panel. For each language, you must create a new JomDirectory Search module. |
|
Note |
Provide additional information. |
Menu Assignment tab
This tab controls where the module should be displayed. You can decide if it should be displayed on all pages for the site or just selective pages.
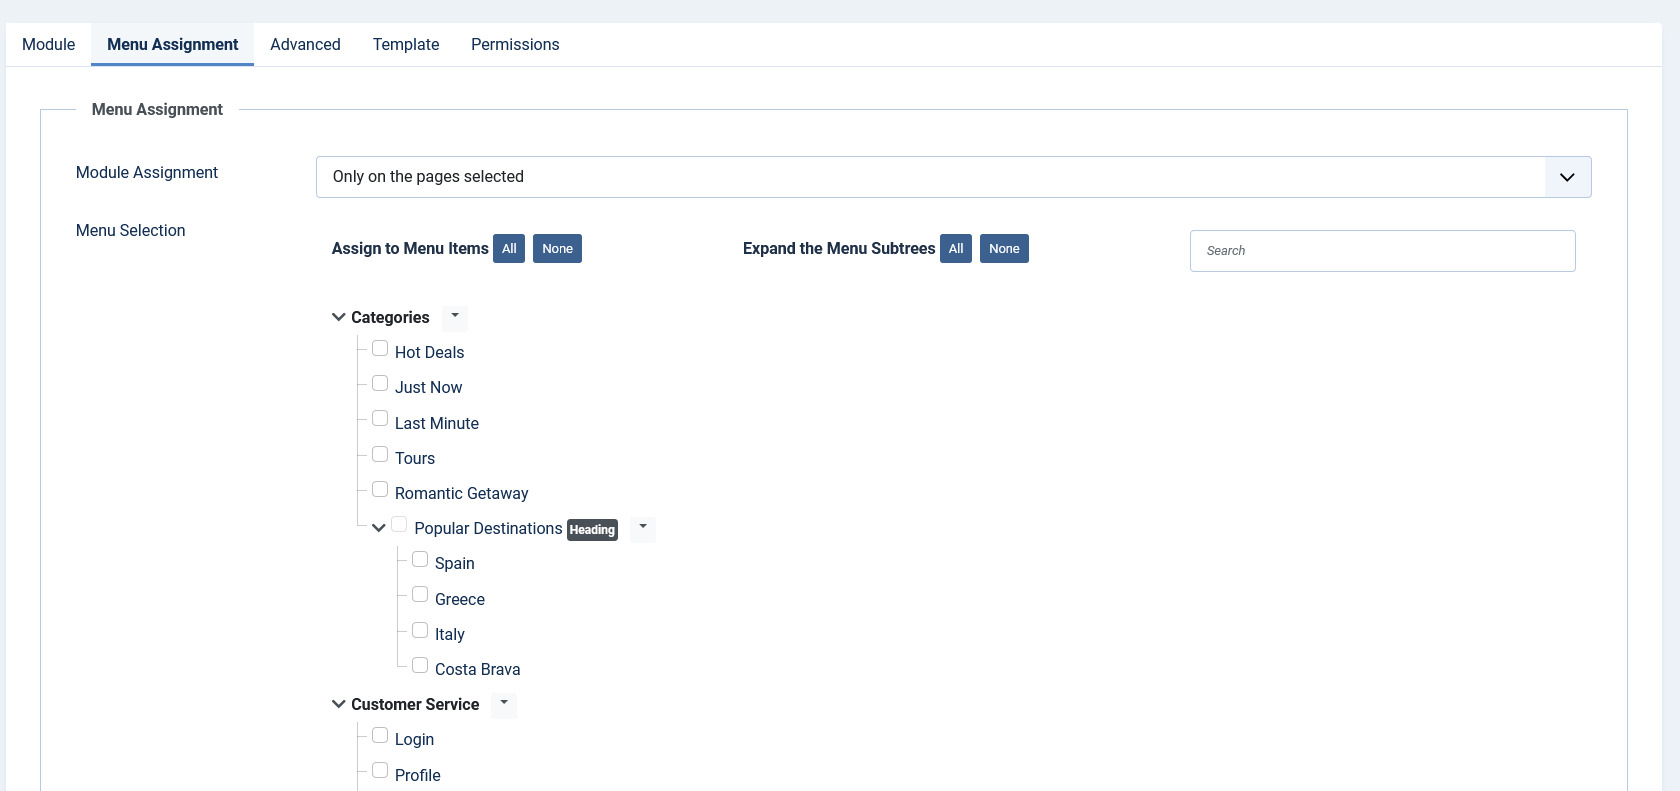
Select the required menu for module assignment. The available options are:
- On all pages
- No pages
- Only on the pages selected
- On all pages except those selected
Creating custom category markers
When any listing is displayed on the map, it is shown as a pin. This pin icon is as in the default template. To modify this pinned icon as per your category, marker image needs to be placed under module images directory:
modules/mod_EXTENSION-NAME_maps/images/markers/...Slideshow PRO Module
Overview
This is an extra paid module available for Business Package, can be also purchased separately.
This module showcases the listings in a slideshow format. Users can see the image along with the title of the listing.
Slideshow PRO Module upon activation is seen as follows on the pages:

Screen 1: Slideshow Module on front page
Editing Slideshow Module
To edit the module, click on the module link or select the check box next to the module name, and then click Edit.
The following image shows the module edit screen.

Screen 2: Module tab
Provide the options as per the following table.
|
Count |
Number of listings for which images need to be shown in the slideshow |
|
Number of characters |
Number of characters from the description that will be shown in the slideshow. |
|
Image Format |
The format for the thumbnail listing image. |
|
Featured |
Enable to show only featured listings. |
|
Show Address |
Enable to show the address of the listing. |
|
Show Description |
Enable to show the description up to the character limit set. |
|
Category |
Select either of the following options.
|
|
Choose Category |
If Selected Below is selected for the above field, select the required category. |
|
Sort Options |
Select how the displayed listings should be sorted by.
|
|
Use Listings IDs |
Enable to make the next set of settings work. |
|
IDs CSS Item Styling |
Provide comma separated IDs in this field. Such as, 21, 22 and so on. |
|
Use IDs for the CSS Classes |
If set to yes, to each Caption, CSS Class ID will be added e.g. .jd-slide-title21 where 21 is ID of the listing. Listing ID can be found under JomEvents Listing View in Table - Column ID. It works best with Use Listings ID's setting You can select individual listings and promote them with different captions. If set to No, the default CSS will be used for all captions. |
Slider Module Tab
This tab controls the layout where the map panel is to be displayed on the screen.
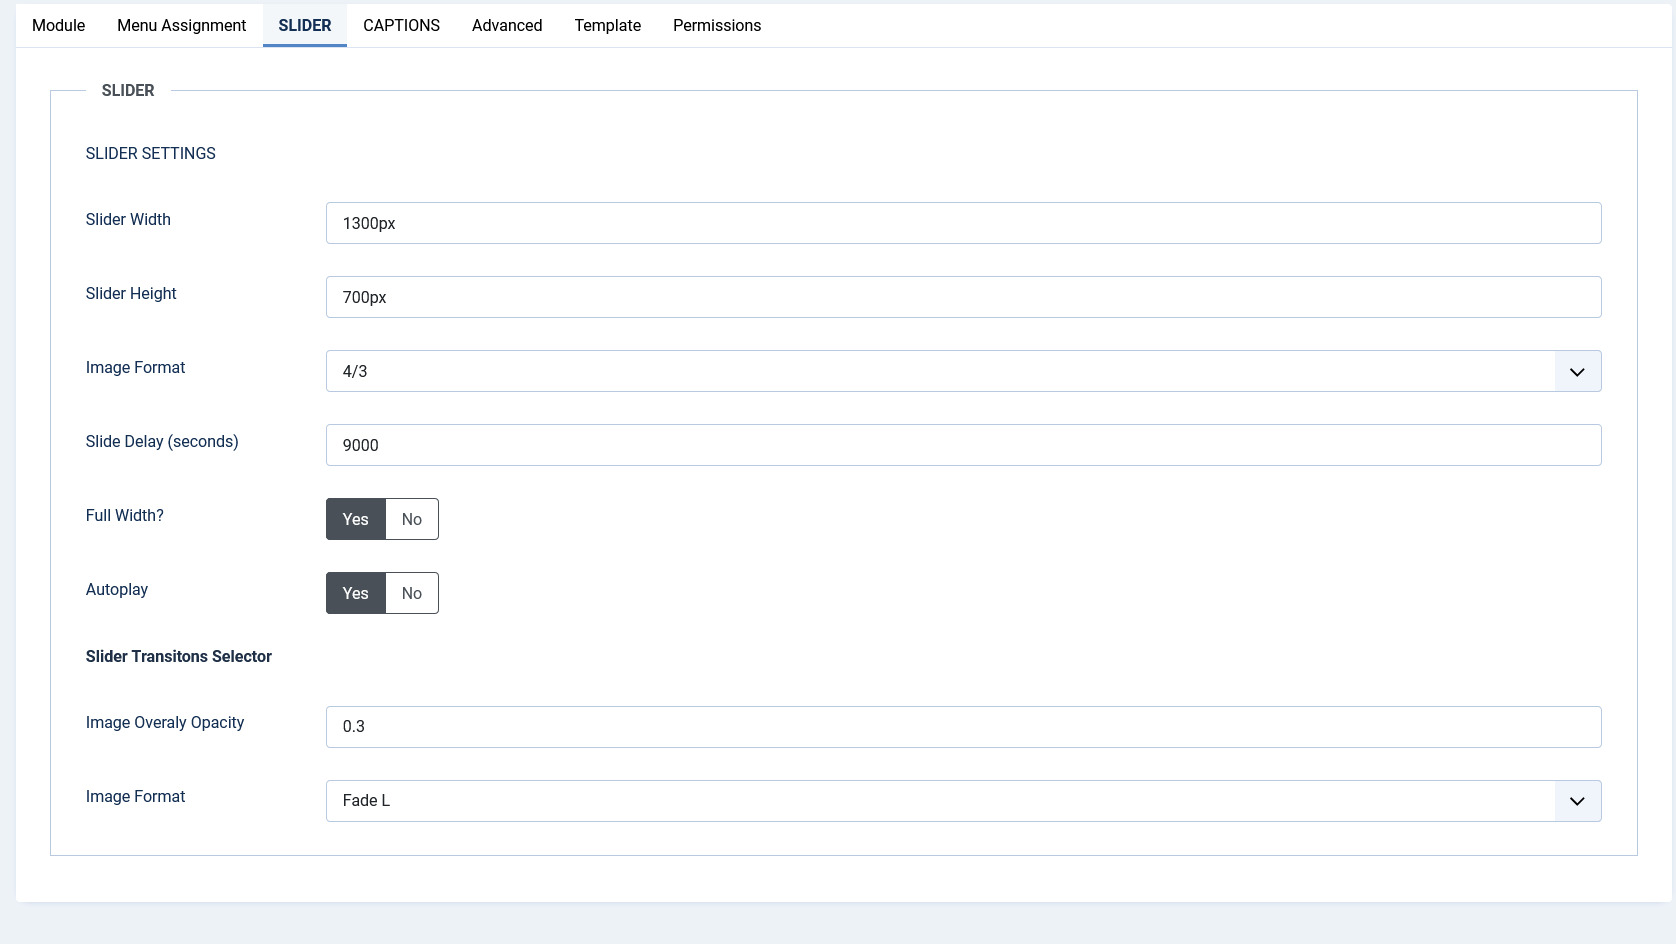
Screen 3: Slider Module tab
|
Slider Width |
Slider width in pixels |
|
Slider Height |
Slider height in pixels |
|
Slide Delay (seconds) |
Slideshow delay in seconds |
|
Full Width |
Enable to cover the entire width of the slideshow image. |
|
Slide Transition |
Select from the following options.
|
|
Slide Navigation |
Select from the following options.
|
|
Autoplay |
Start slider when page loaded |
Menu Assignment tab
This tab controls where the module should be displayed. You can decide if it should be displayed on all pages for the site or just selective pages.

Select the required menu for module assignment. The available options are:
- On all pages
- No pages
- Only on the pages selected
- On all pages except those selected